In this tutorial, we'll learn about how to authenticate a front-end application using Next.js and Strapi.
Table of Contents
- Introduction
- Getting started with authentication
- Installing necessary dependencies
- Saving user token in a cookie
- Setting up permissions for Products API
- Redirecting users to index page for authenticated users
- Adding the option to unauthenticate a user
- Conclusion
Introduction
We'll start from where we finished in How to Automate the Backend stuffs with Open Source Headless CMS Strapi and Docker. The starter code is available on Github. The code for Strapi project is available in the backend directory and the code for Next.js is available in the frontend directory.
Getting started with authentication
First, we'll build the authentication in our frontend application. To do that, we'll add a new sign up page.
import React, { useState } from "react";
import Head from "next/head";
import axios from "axios";

import "../public/assets/styles/tailwind.css";

const SignUp = () => {
  const [username, setUsername] = useState("");
  const [email, setEmail] = useState("");
  const [password, setPassword] = useState("");

  const handleSubmit = async (e) => {
    e.preventDefault();

    const res = await axios.post("http://localhost:1337/auth/local/register", {
      username,
      email,
      password,
    });

    // res.data contains data for authenticated user
    console.log(res.data);
  };

  return (
    <div>
      <Head>
        <title>Sign Up</title>
        <link rel="icon" href="/favicon.ico" />
      </Head>
      <div className="flex justify-center items-center h-screen bg-gray-100">
        <div className="w-full max-w-md">
          <form className="bg-white shadow-lg rounded p-8">
            <div className="mb-4">
              <label
                className="block text-gray-700 text-sm font-bold mb-2"
                htmlFor="username"
              >
                Username
              </label>
              <input
                className="appearance-none border rounded w-full p-3 text-gray-700 leading-tight focus:outline-none focus:shadow-outline"
                id="username"
                type="text"
                placeholder="John Doe"
                value={username}
                onChange={(e) => setUsername(e.target.value)}
              />
            </div>
            <div className="mb-4">
              <label
                className="block text-gray-700 text-sm font-bold mb-2"
                htmlFor="email"
              >
                Email Address
              </label>
              <input
                className="appearance-none border rounded w-full p-3 text-gray-700 leading-tight focus:outline-none focus:shadow-outline"
                id="email"
                type="email"
                placeholder="john@doe.com"
                value={email}
                onChange={(e) => setEmail(e.target.value)}
              />
            </div>
            <div className="mb-8">
              <label
                className="block text-gray-700 text-sm font-bold mb-2"
                htmlFor="password"
              >
                Password
              </label>
              <input
                className="appearance-none border rounded w-full p-3 text-gray-700 leading-tight focus:outline-none focus:shadow-outline"
                id="password"
                type="password"
                placeholder="********"
                value={password}
                onChange={(e) => setPassword(e.target.value)}
              />
            </div>
            <div className="flex items-center justify-between">
              <button
                className="bg-blue-500 hover:bg-blue-700 text-white font-bold py-4 px-12 rounded focus:outline-none focus:shadow-outline"
                type="button"
                onClick={handleSubmit}
              >
                Sign Up
              </button>
              <a
                className="inline-block align-baseline font-bold text-sm text-blue-500 hover:text-blue-800"
                href="#"
              >
                Forgot Password?
              </a>
            </div>
          </form>
        </div>
      </div>
    </div>
  );
};

export default SignUp;
Installing necessary dependencies
We need to install the necessary dependencies:
yarn add axios
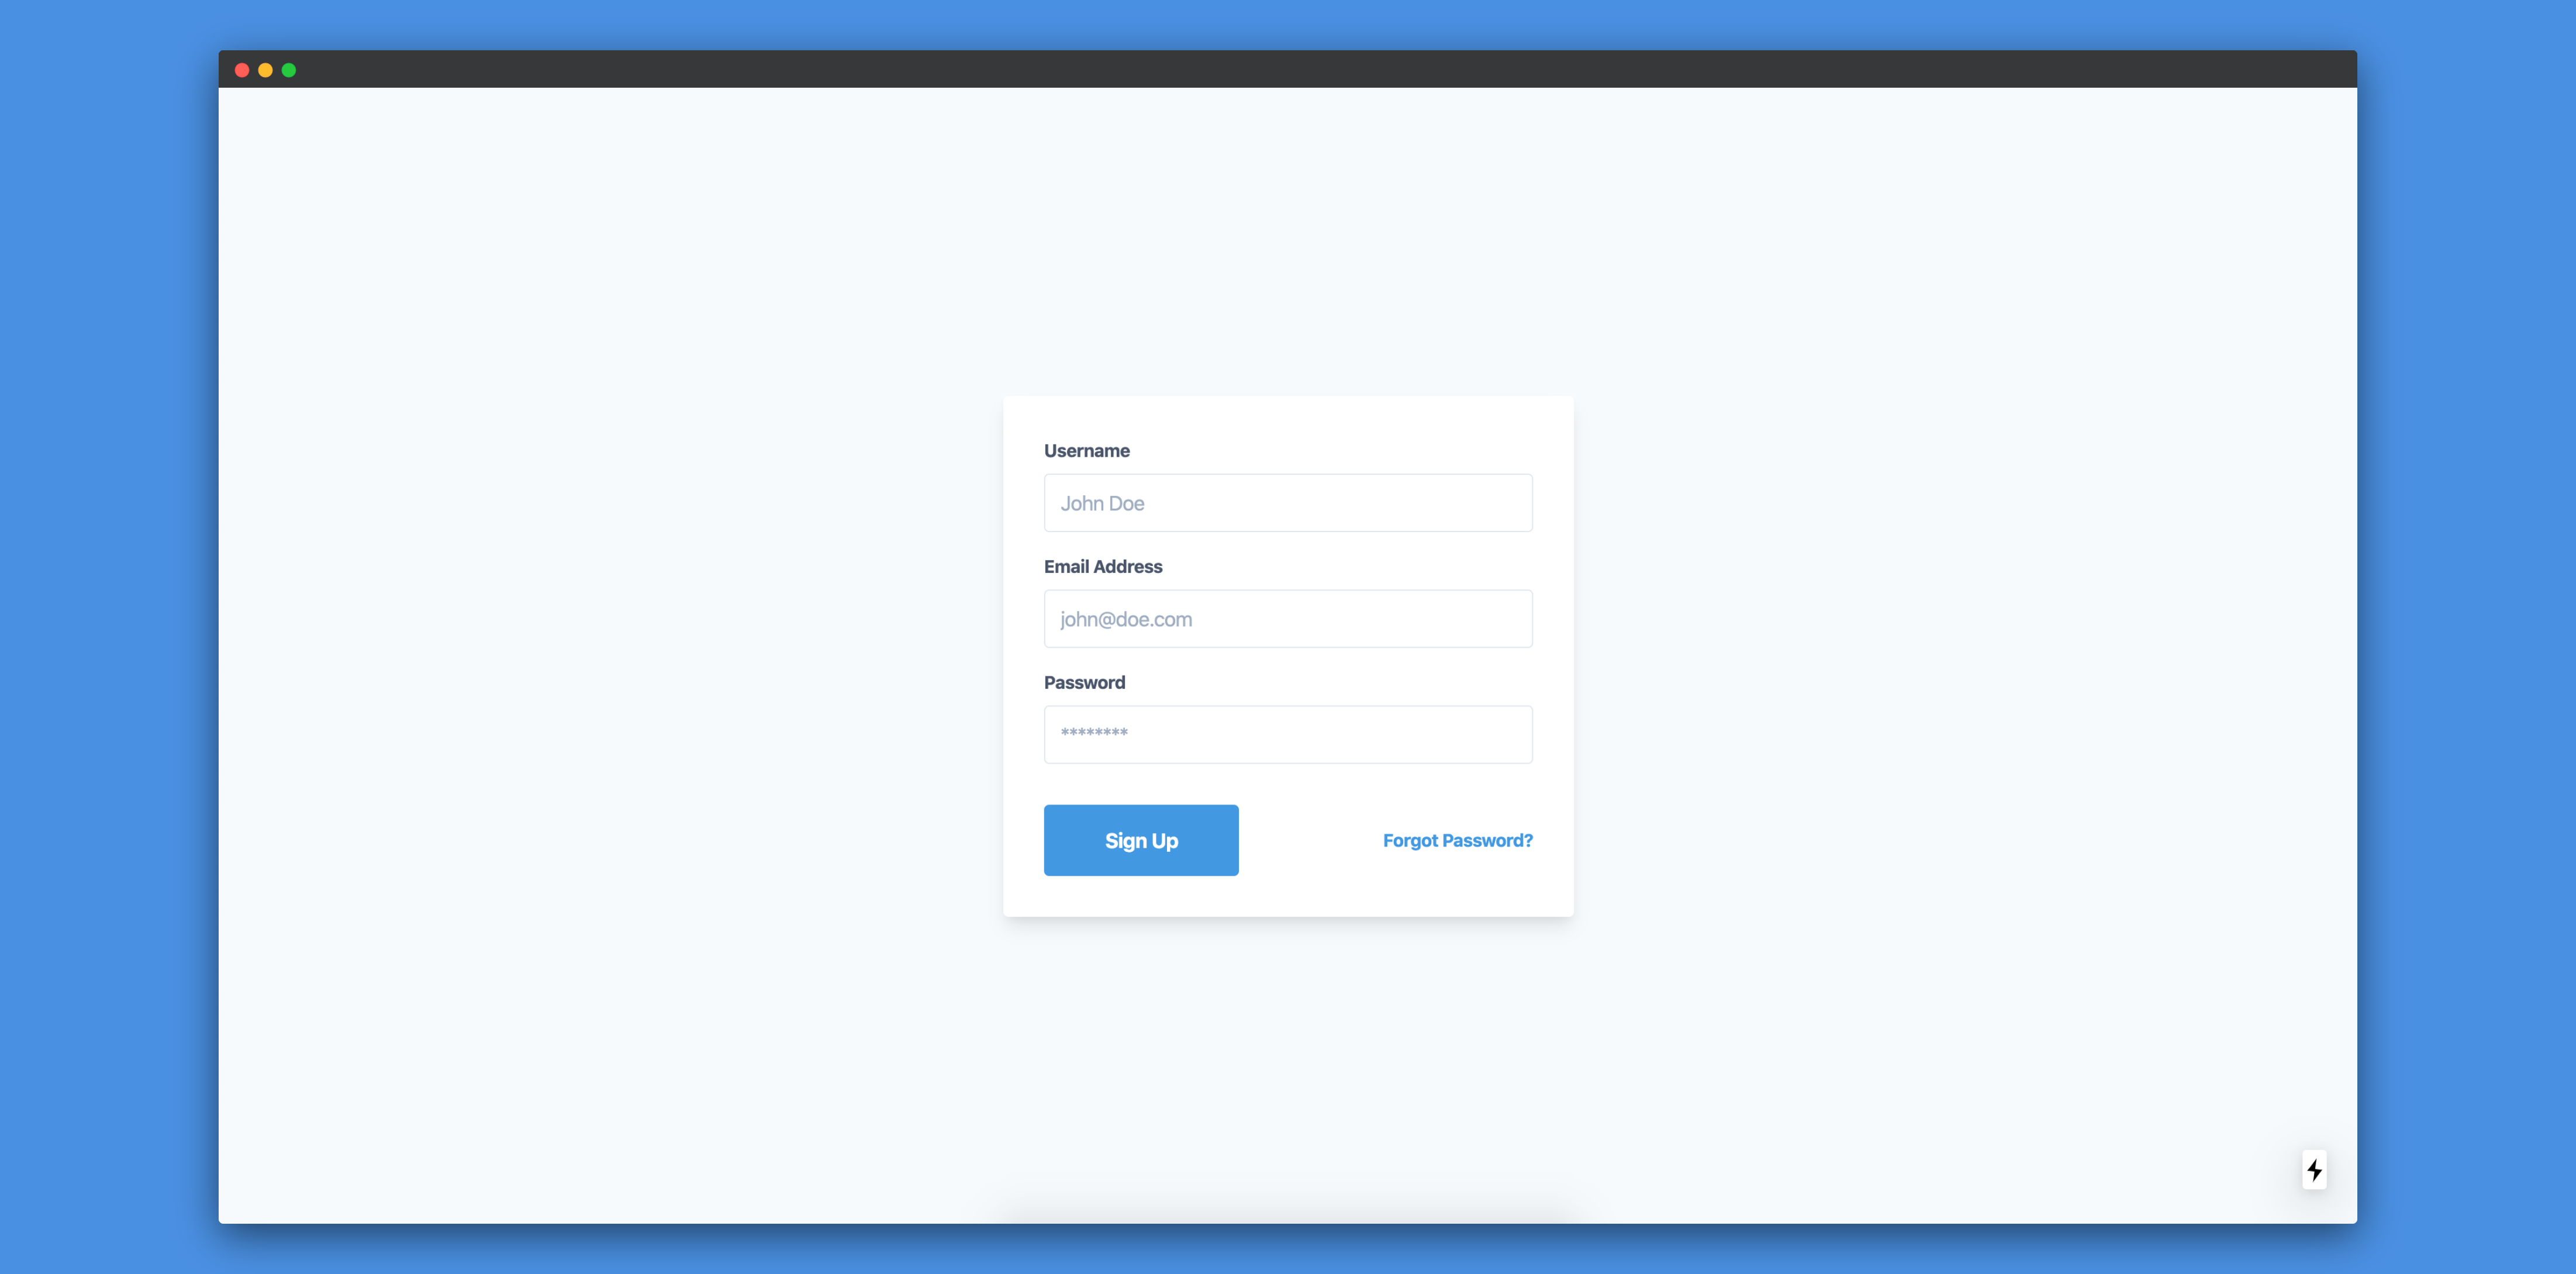
Now, if we visit http://localhost:3000/sign-up, we should see the following page:
If we fill in the details of the form, we can view the response from the server in the browser's console:

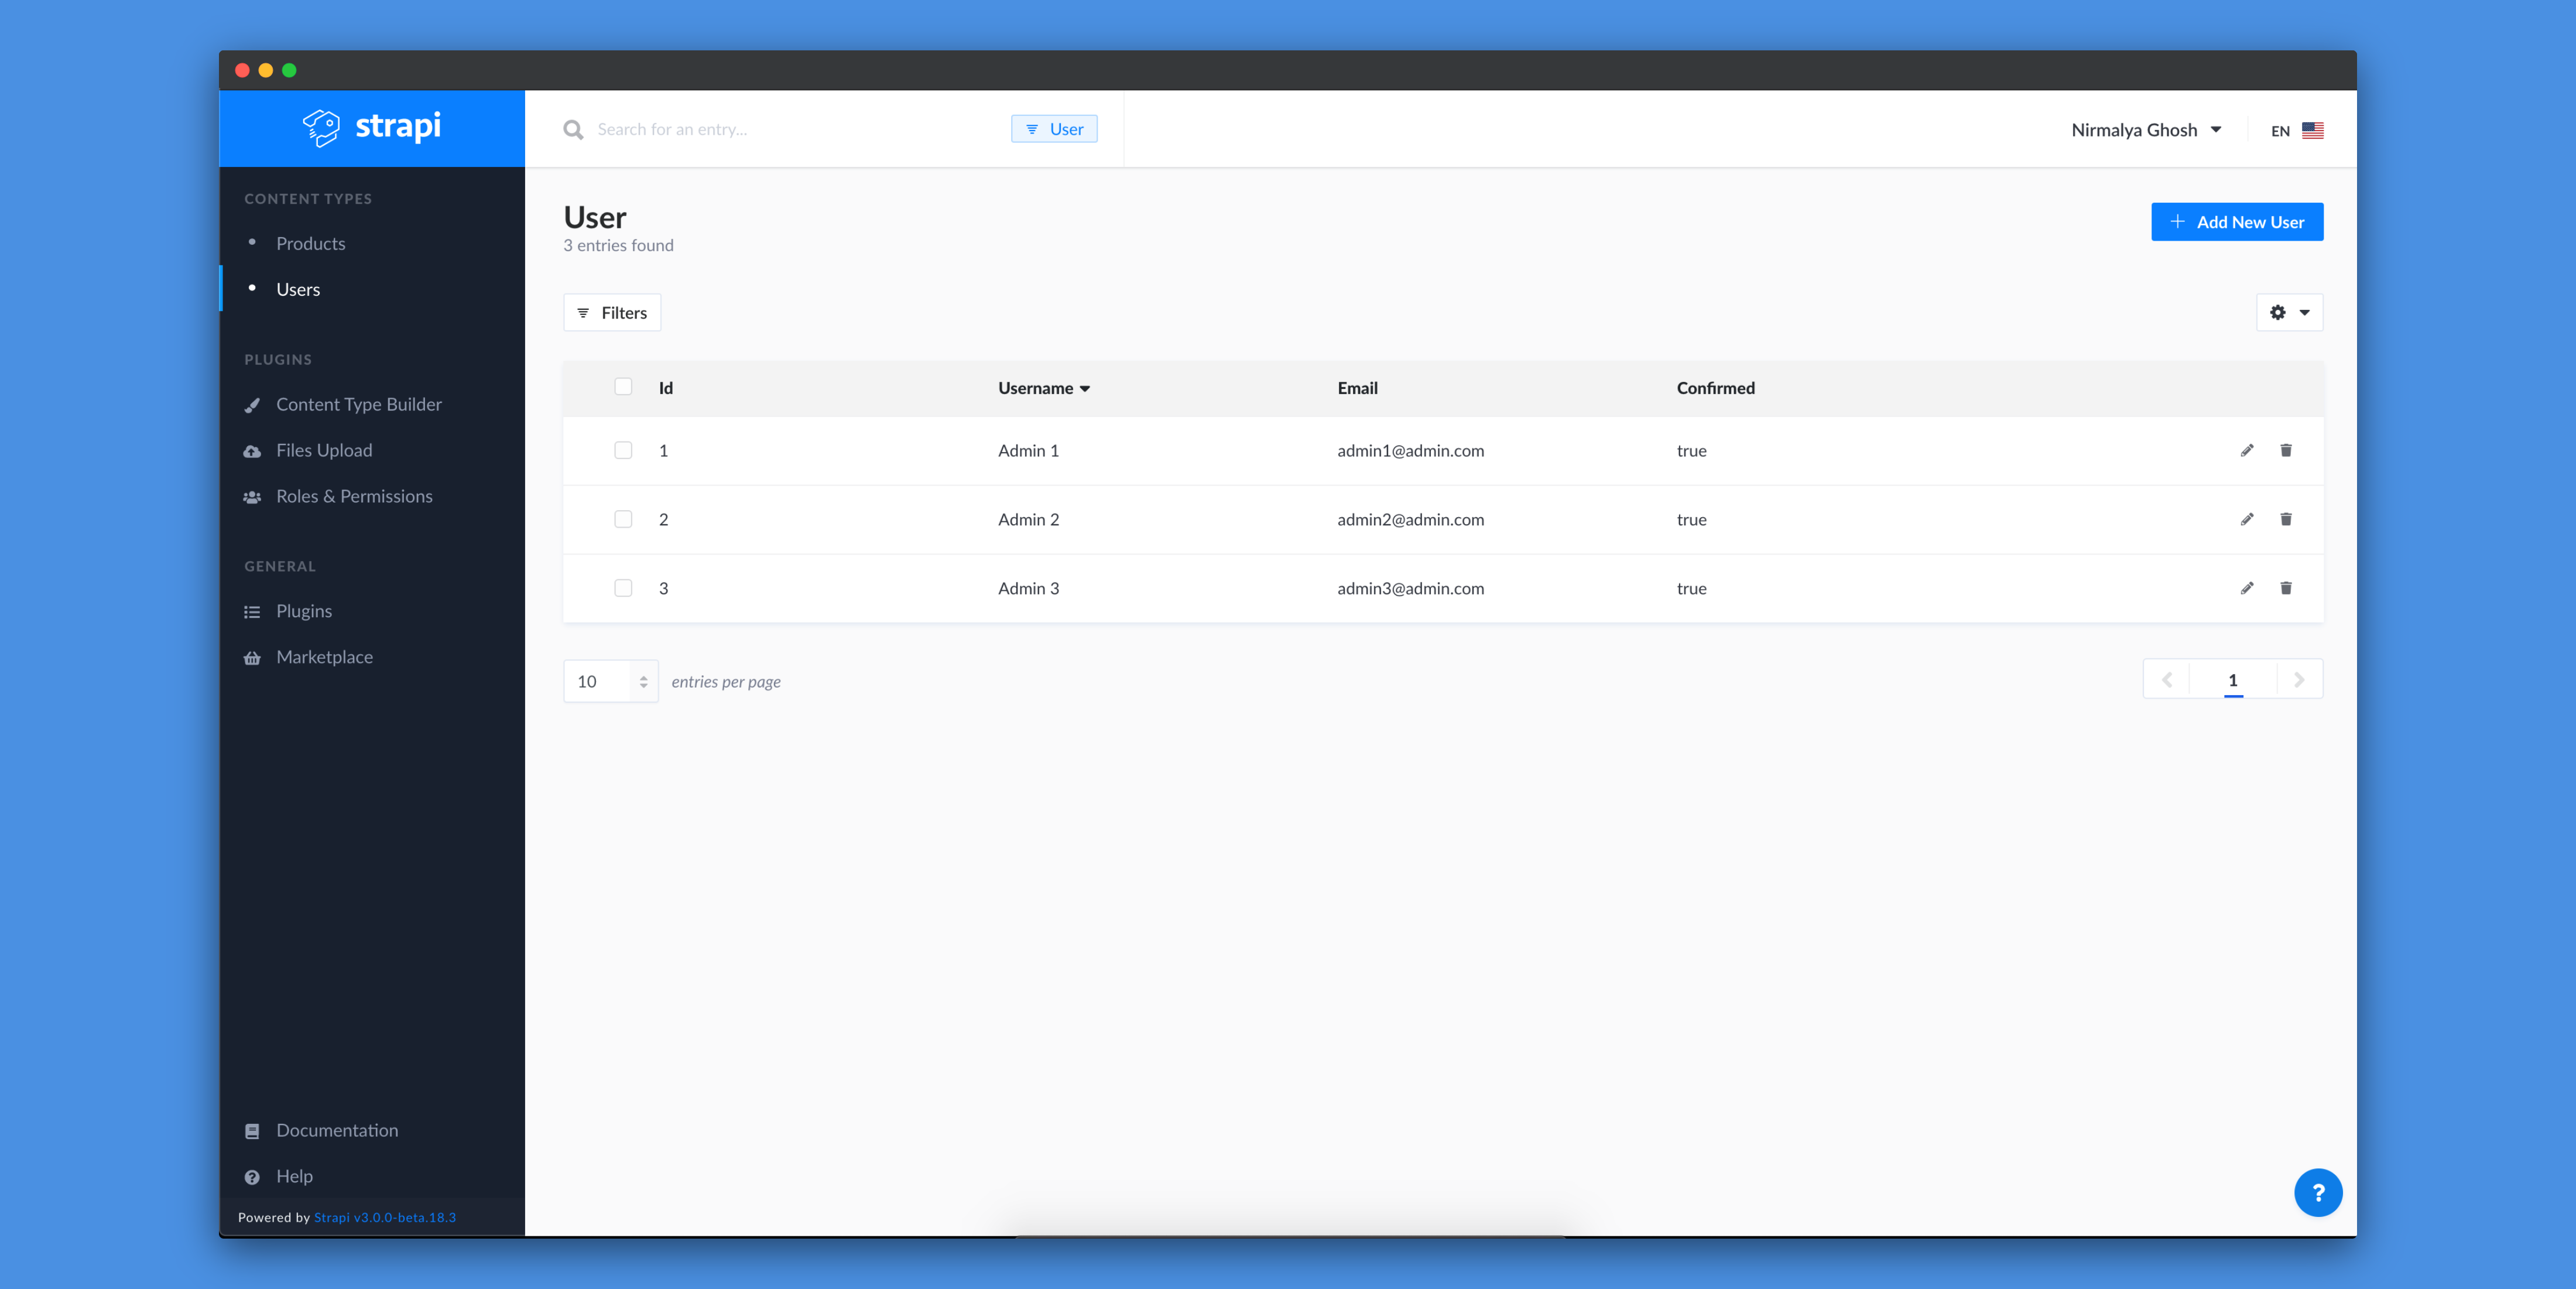
In the Strapi Admin Panel, we can see the new user:
Saving user token in a cookie
Next, we need to save the token in a cookie. We'll be using a plugin nookies for handling that. So, let's install that dependency:
yarn add nookies
We need to update our handleSubmit method:
import React, { useState } from "react";
import Head from "next/head";
import axios from "axios";
import { setCookie } from "nookies";

  ..

const SignUp = () => {

  ..

  const handleSubmit = async e => {
    e.preventDefault();

    const res = await axios.post("http://localhost:1337/auth/local/register", {
      username,
      email,
      password
    });

    setCookie("", "token", res.data.jwt, {
      maxAge: 30 * 24 * 60 * 60,
      path: "/"
    });
  };

  ..

}
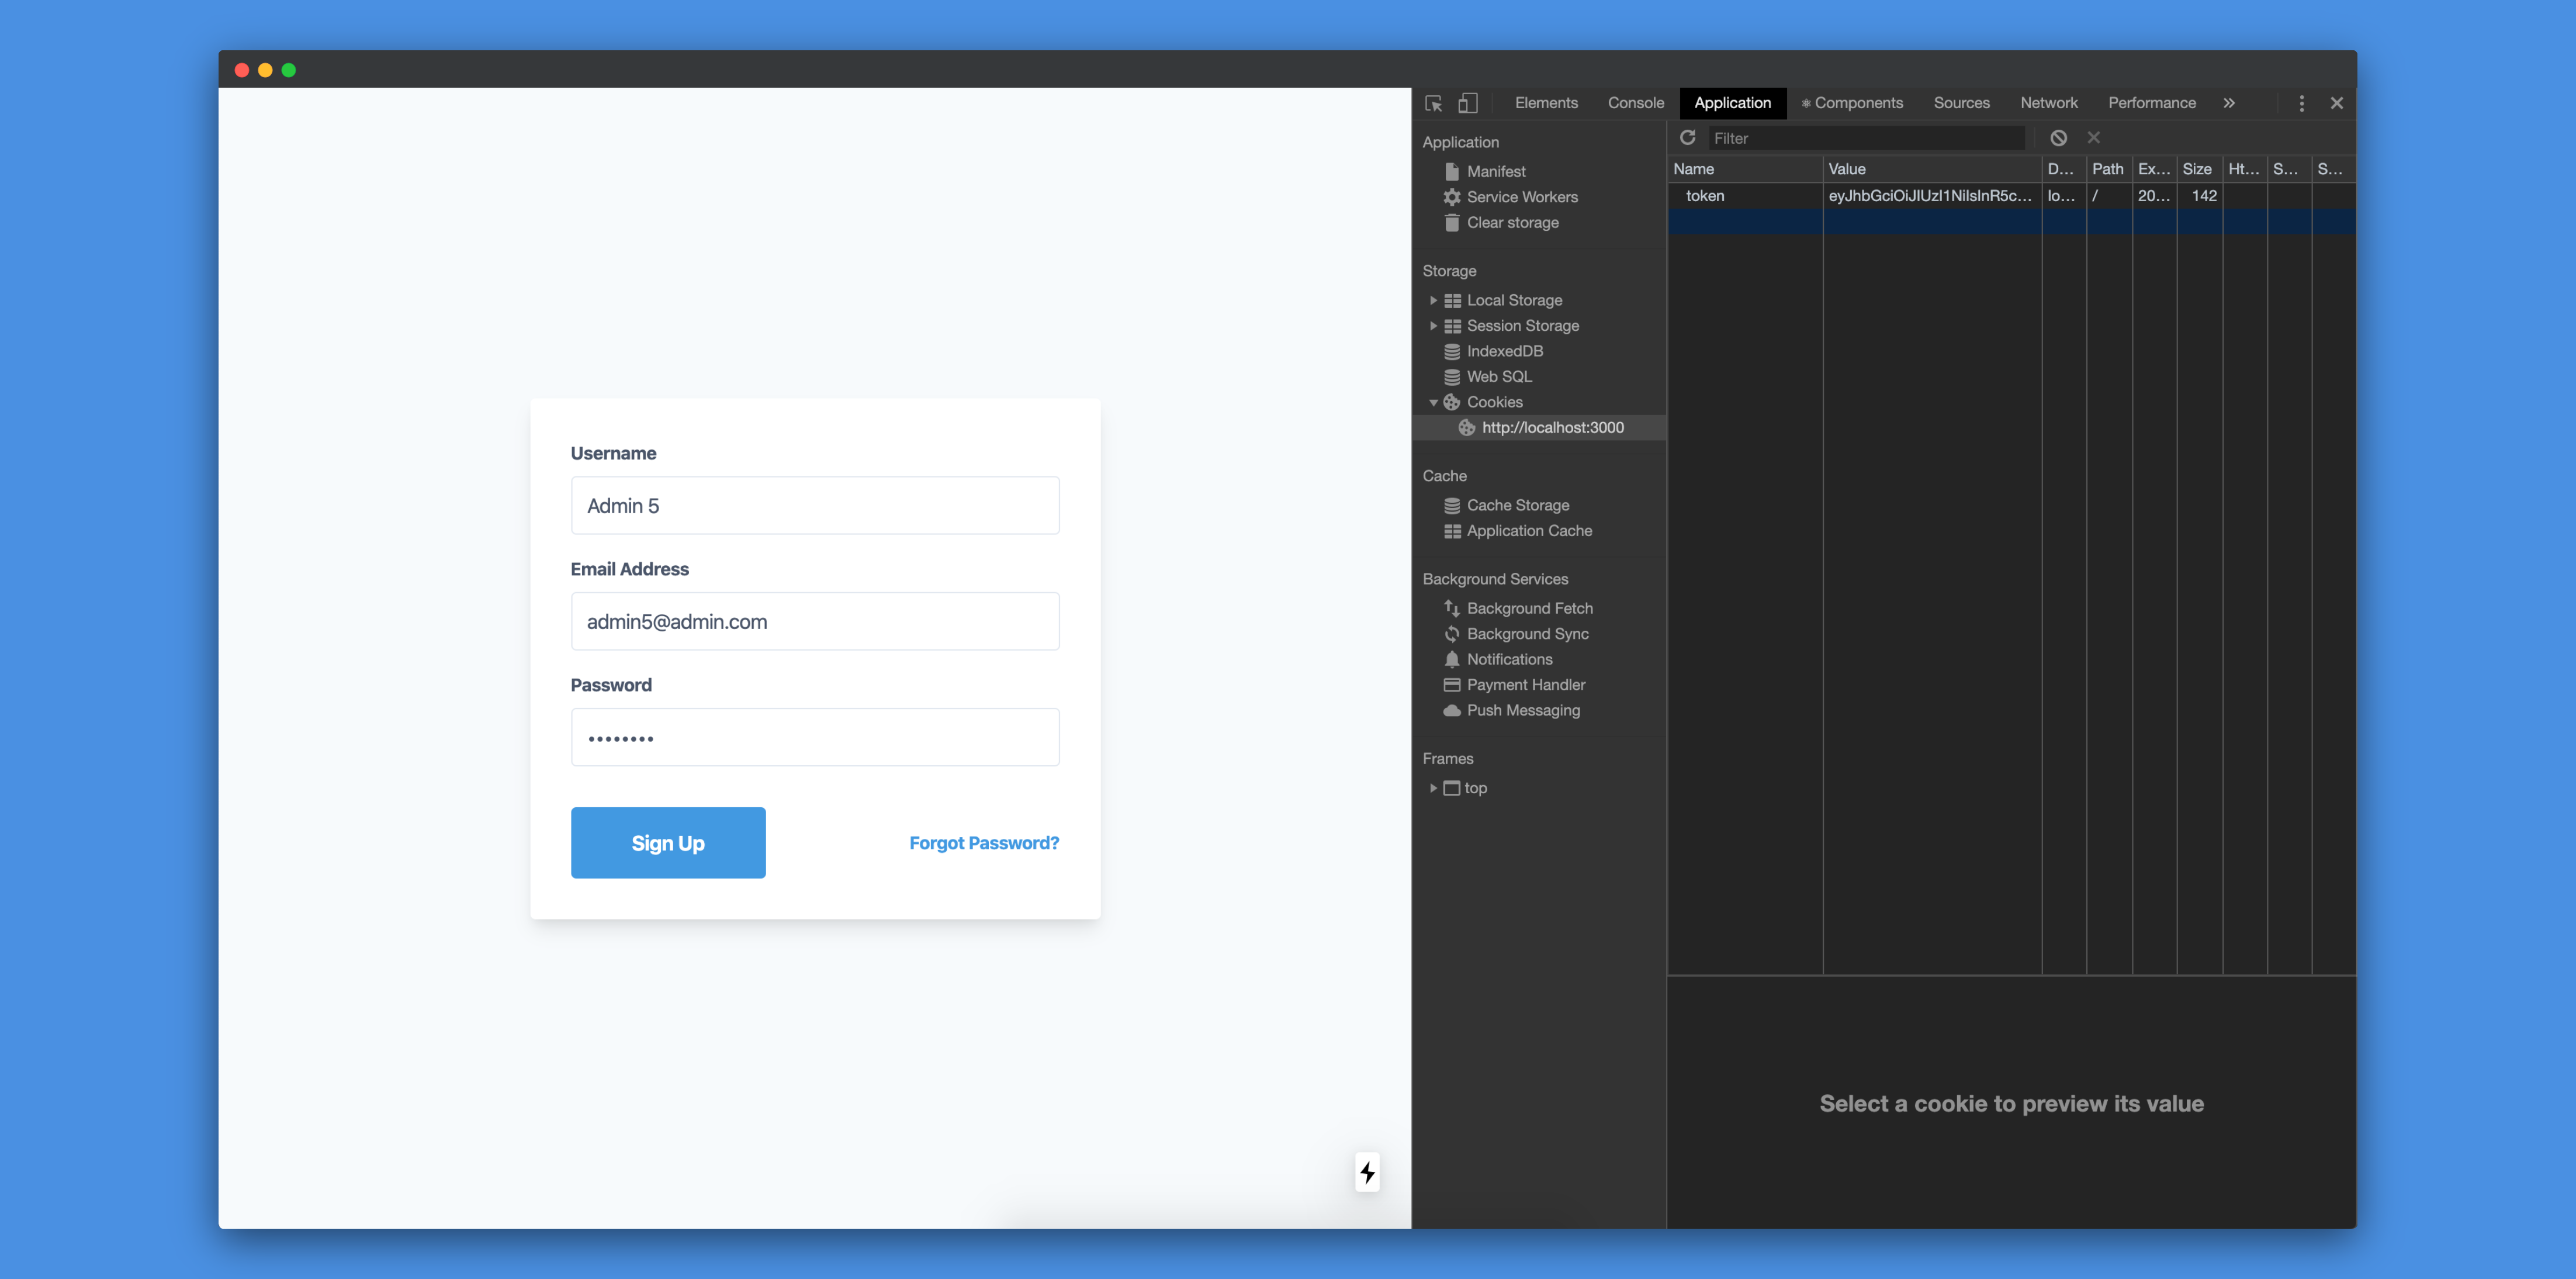
Now, if we try to register a new user, the token will be stored in the cookie:
Setting up permissions for Products API
According to Strapi's Token Usage, we need to send the token in the Authorization header.
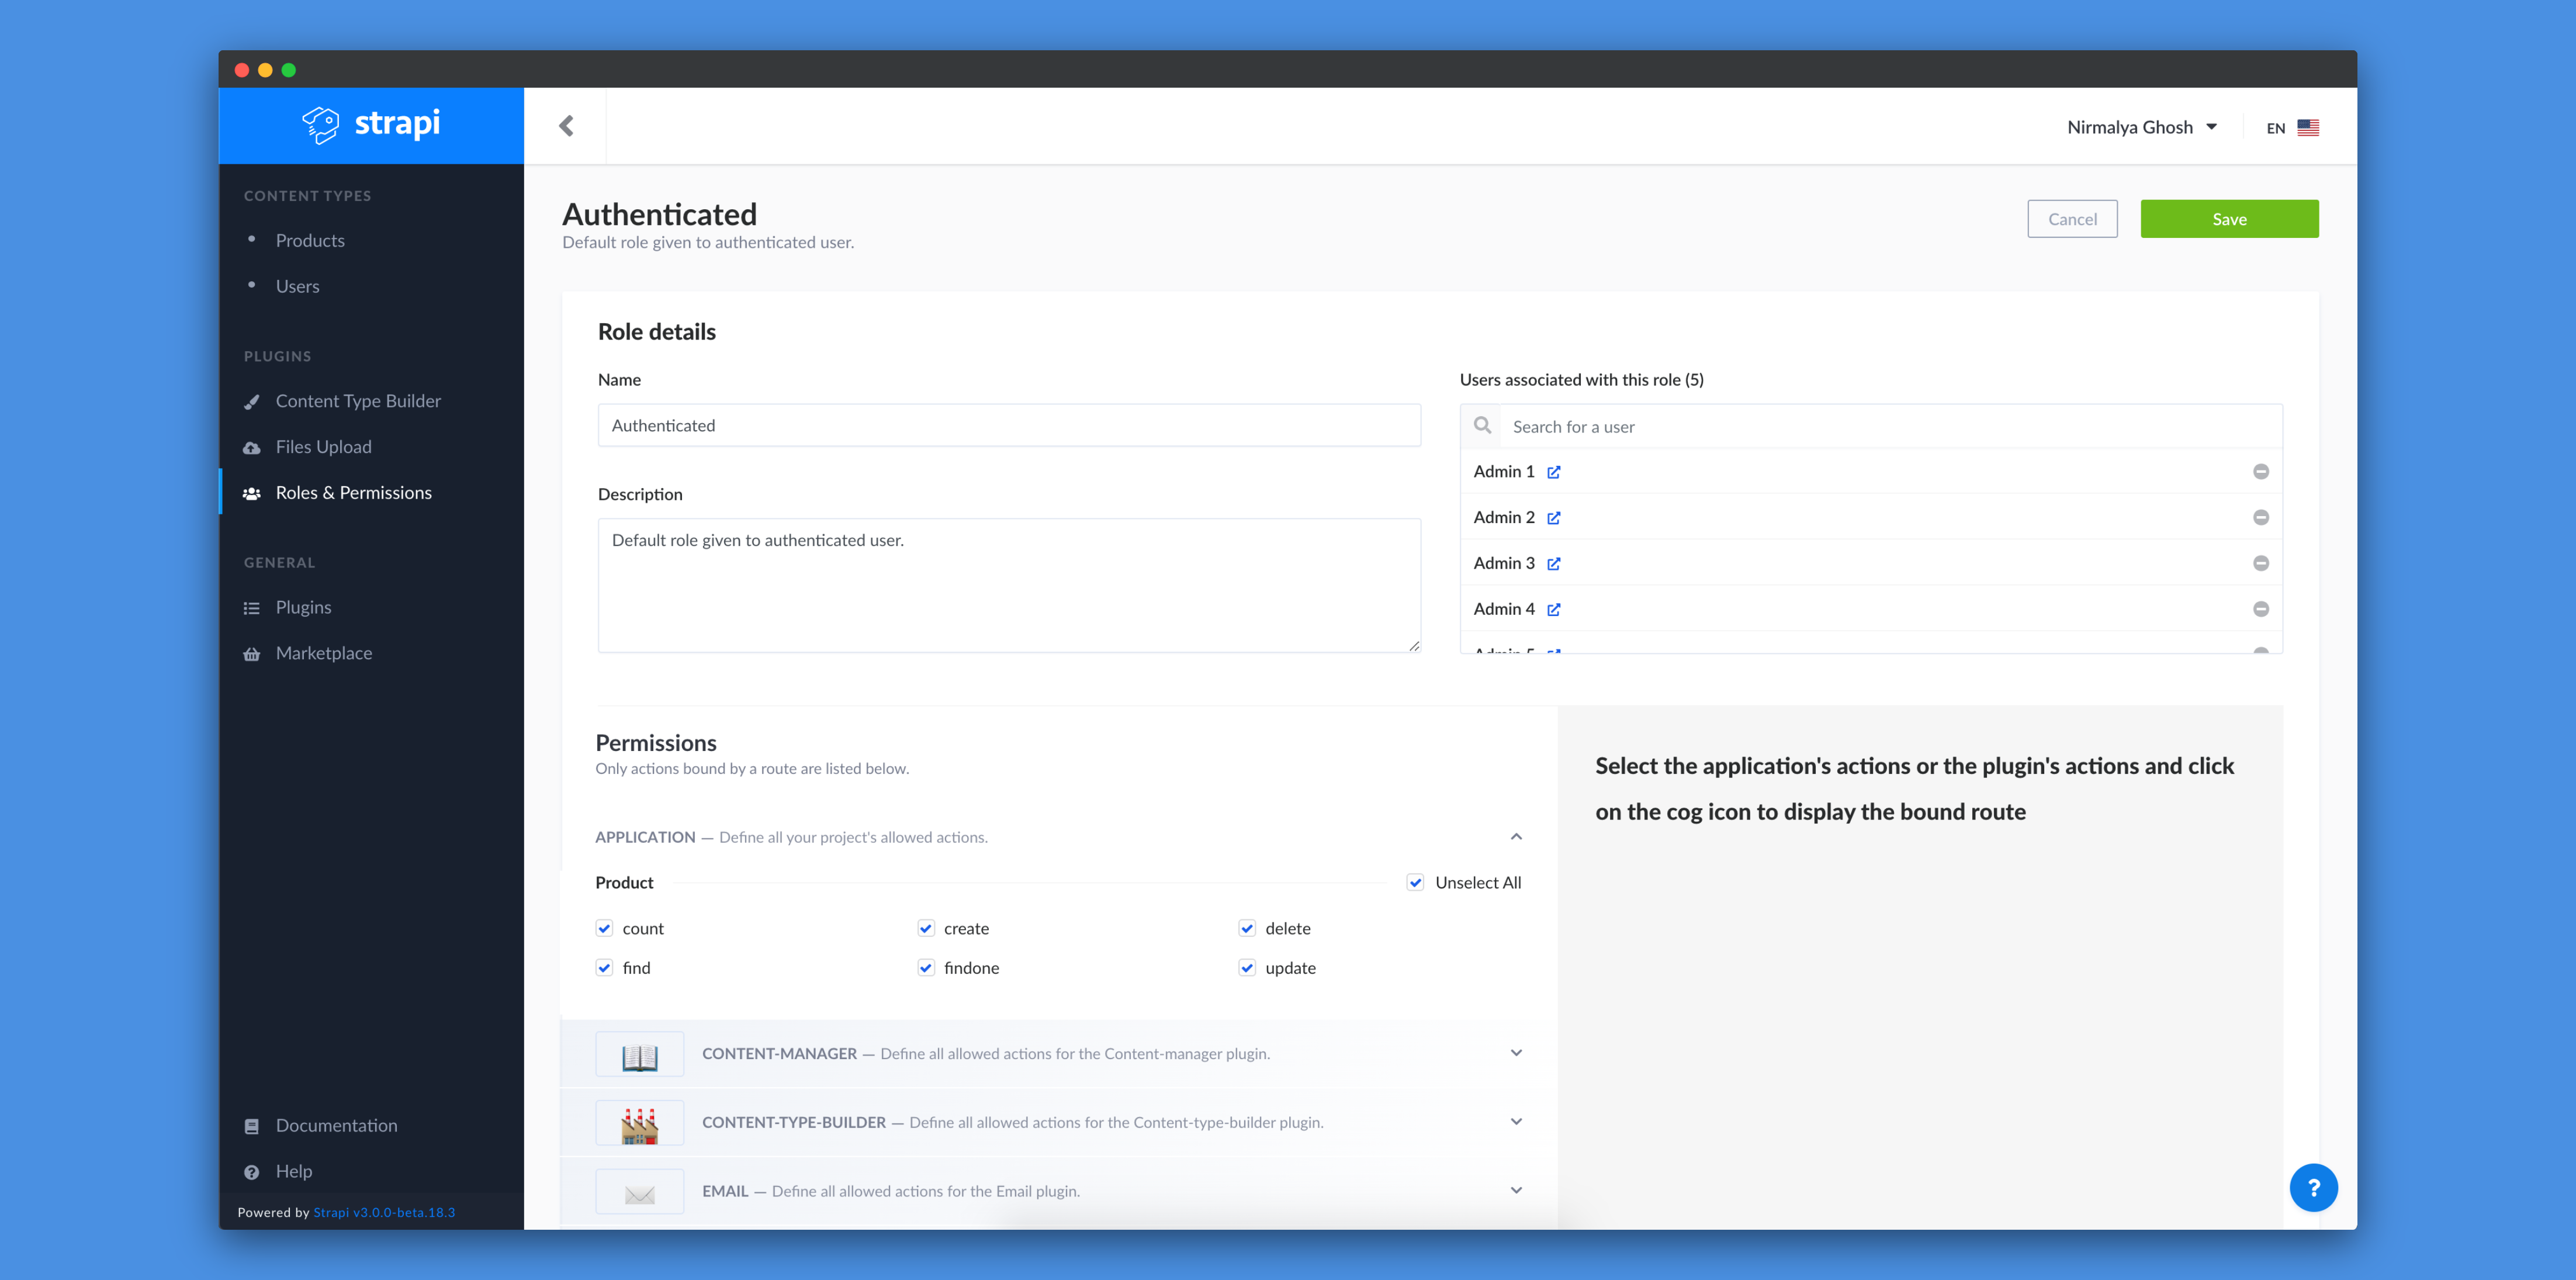
First, we need to allow authenticated users to view all the products. To do that, we need to give all the permissions to authenticated users:
If we do GET http://localhost:1337/products, we'll get an error:
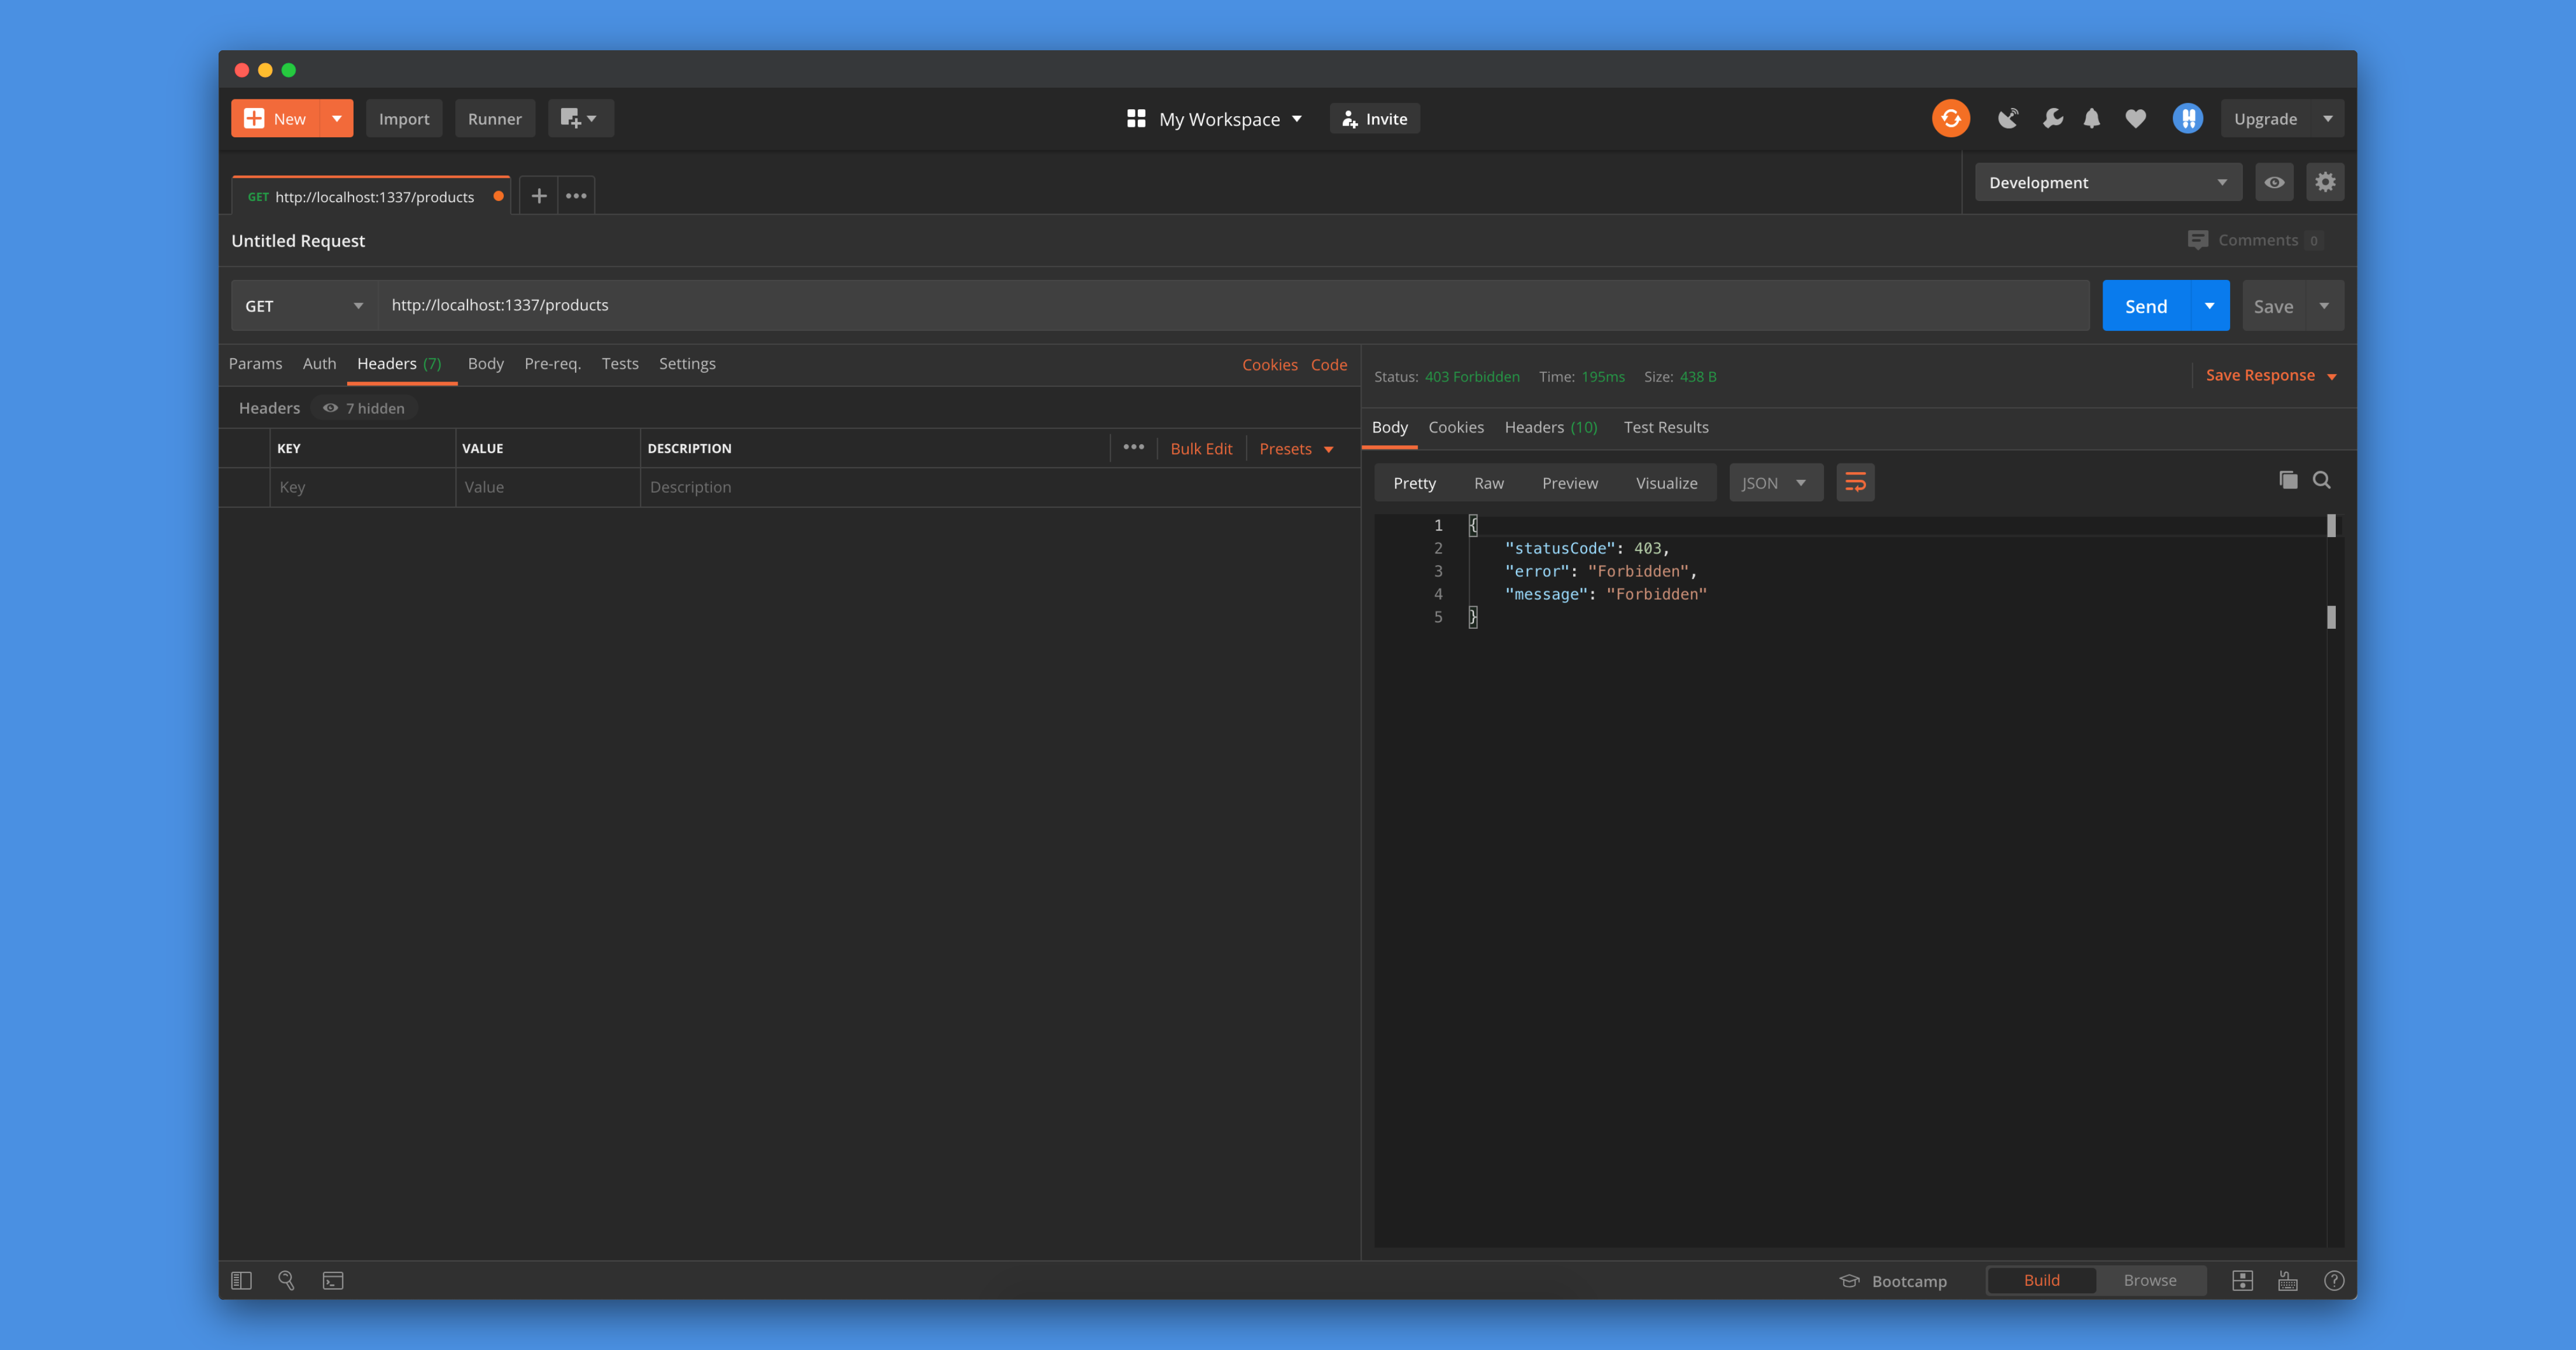
We need to send the token in the Authorization header to get the proper data:
Redirecting users to index page for authenticated users
Next, we'll redirect all the users to the index page if there is a token present and the user visited the sign up page:
SignUp.getInitialProps = (ctx) => {
  const isAuthenticated = !!parseCookies(ctx).token;

  // When the user is authenticated, don't let the user visit the
  // sign-in and sign-up routes
  if (isAuthenticated && ["/sign-up", "/sign-in"].indexOf(ctx.asPath) > -1) {
    if (typeof window !== "undefined") {
      Router.push("/");
    } else {
      if (ctx.res) {
        ctx.res.writeHead(301, {
          Location: "/",
        });
        ctx.res.end();
      }
    }
  }

  return {};
};
Adding the option to unauthenticate a user
We just need to add the option to log a user our. We'll add a button on the Nav component:
  ..

import { destroyCookie } from "nookies";
import Router from "next/router";

  ..

const handleSignOut = () => {
  destroyCookie("", "token");
  Router.push("/sign-up");
};

const Nav = () => (
  <nav>
    <ul>

      ..

      <li>
        <button onClick={handleSignOut}>Log out</button>
      </li>
    </ul>

  ..
The handleSignOut method will remove the token cookie and then redirect the user to the http://localhost:3000/sign-up route.
Conclusion
In this tutorial, we've learnt about how to perform authentication using Strapi and Next.js. You can refer to this commit for all the changes in this tutorial. I hope that this article helps you in your future projects.