In this tutorial, we'll learn all the things that are necessary to build an accessible pagination component with a good User Experience using React. The source code is available on Github. You can view a demo of the application here.
Table of Contents
- What is a Pagination component and where is it used?
- Difference between Pagination and Infinite Scrolling
- When should we use Pagination instead of Infinite Scrolling?
- Types of Pagination
- Client-side Pagination
- Server-side Pagination
- Building a simple Pagination component using React
- Adding styles to our Pagination component
- Making our Pagination component theme-able using Theme UI
- Conclusion
What is a Pagination component and where is it used?
A Pagination component helps in fetching and showing data in steps. It's mainly useful in the following scenarios:
- Lists or tables which consists of a large set of data
- Cases, where we might want to show data in steps
- Cases, where a long time will be taken to fetch and show the whole data
Difference between Pagination and Infinite Scrolling
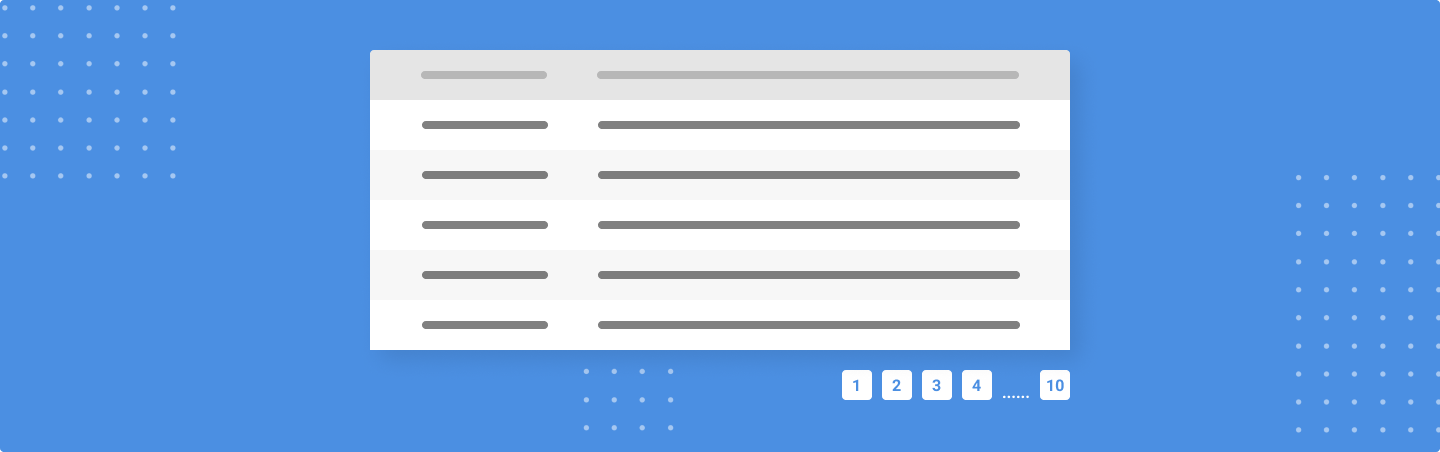
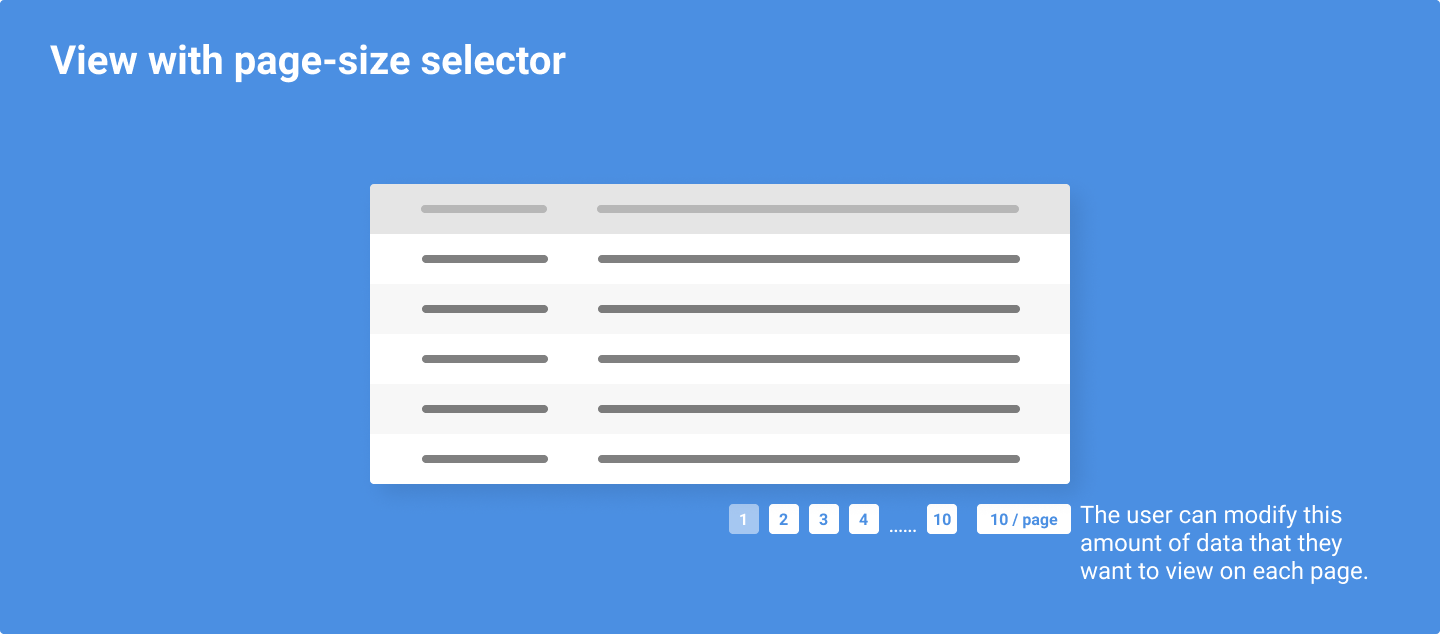
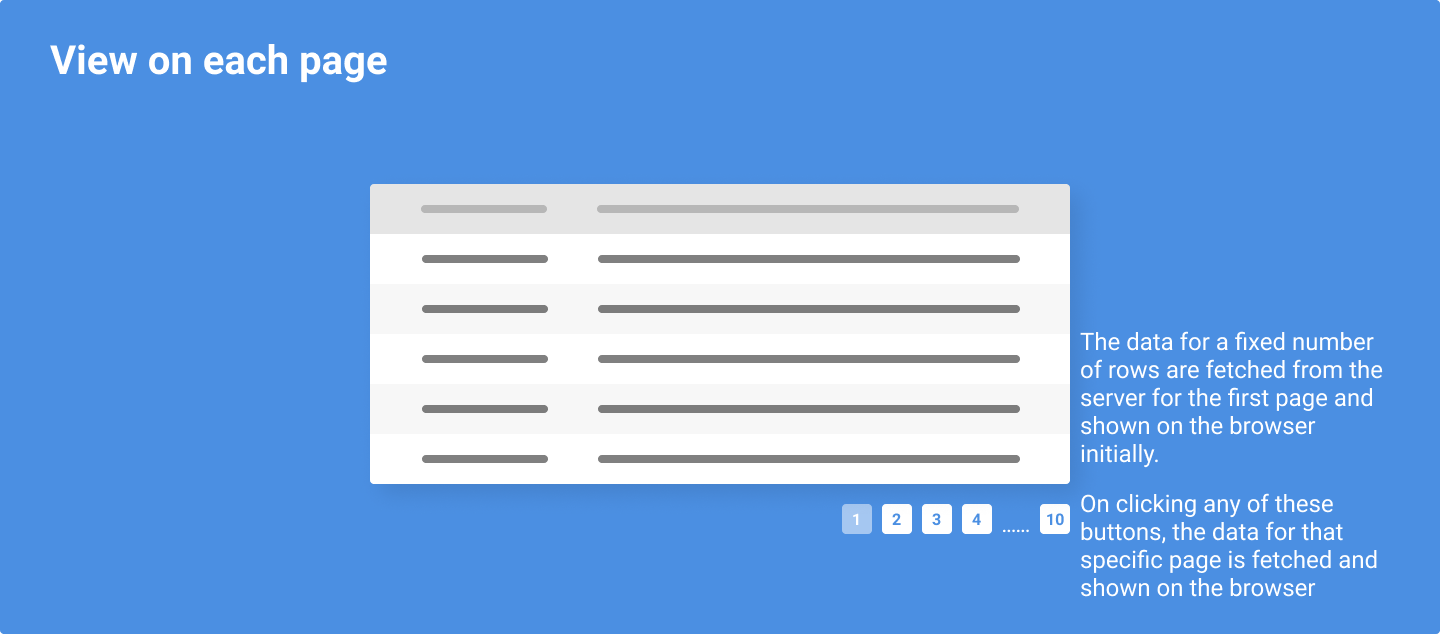
A Pagination component is useful for fetching fragments of data and showing it to the user. The user can control when they want to view the next set of data. In a Pagination component, the user can also control the amount of data that they want to view.
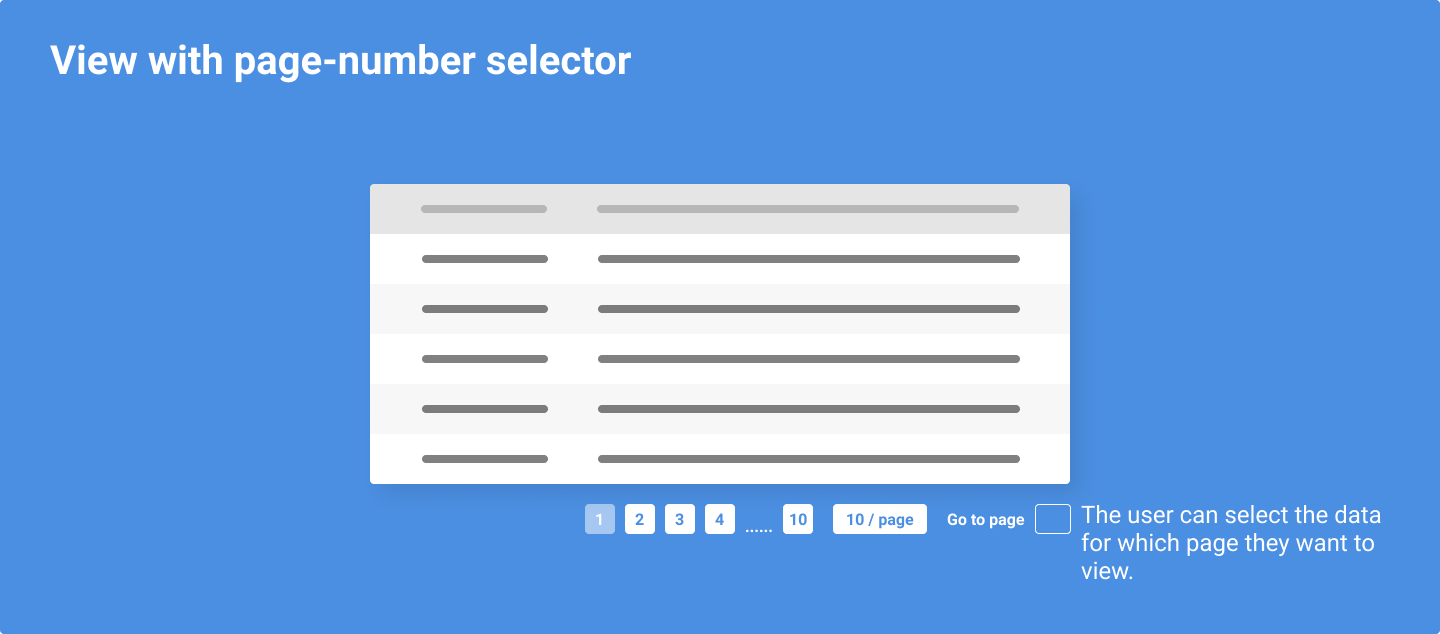
In most cases like in Ant Design and Semantic UI, the user can also view the data for a particular page directly by typing the number of that page in a small input box.
In an Infinite Scrolling component, initially, a subset of the whole data is shown. However, when the user scrolls to the bottom of the list or table, the next set of data is fetched from the server and shown on the browser.
For example, initially a set of 5 records out of 100 records will be fetched from the server and rendered on the list or table. When the user scrolls to the bottom of the list or table, the next 5 records are fetched from the server and shown.
It's also possible that the whole data is fetched initially but the records are shown lazily. This is done in order to reduce Cognitive Overload.
When should we use Pagination instead of Infinite Scrolling?
This article explains the answer for this question in details. However, if an application needs to remember the scroll-position of the user during page transition, then it's always better to use pagination. For example, if we have an e-commerce application, we'll need to remember the scroll-position of the user in case of a page transition.
Types of Pagination
Effectively, there are two types of pagination:
- Client-side pagination
- Server-side pagination
We'll be talking about both of these in details.
Client-side Pagination
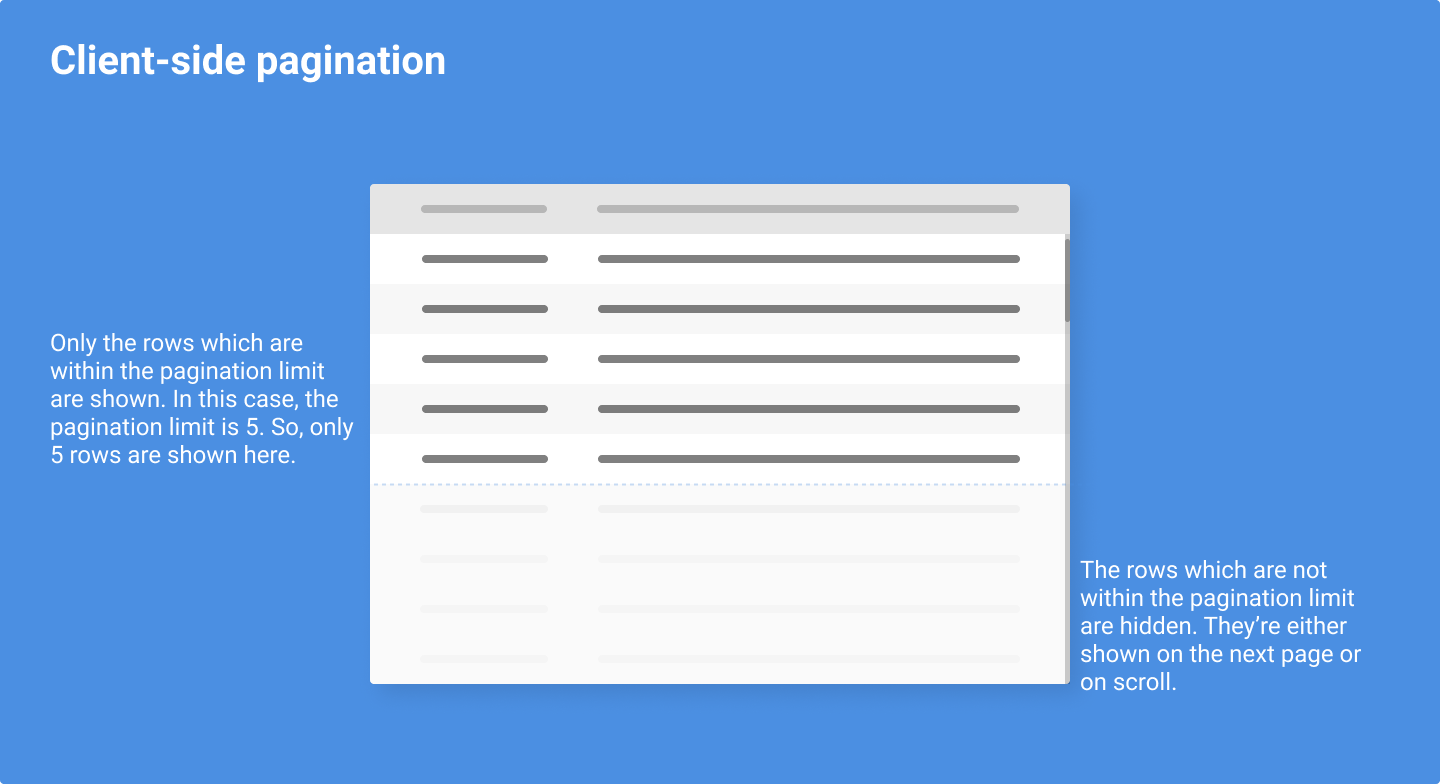
In this type of pagination, the whole data is fetched from the server but is shown on the browser in steps. There can be certain cases in which the pagination can't be implemented on the server. In those cases, the pagination is generally done on the client-side.
This type of pagination can be achieved in the following ways:
- Fetch all the records from the server
- Divide the records into certain parts based on a certain limit per page
- Show a set of records on each page
- Show the next set of records when the user clicks on the next page and so on
- Sorting, searching and filtering of records is done on the client-side
Server-side Pagination
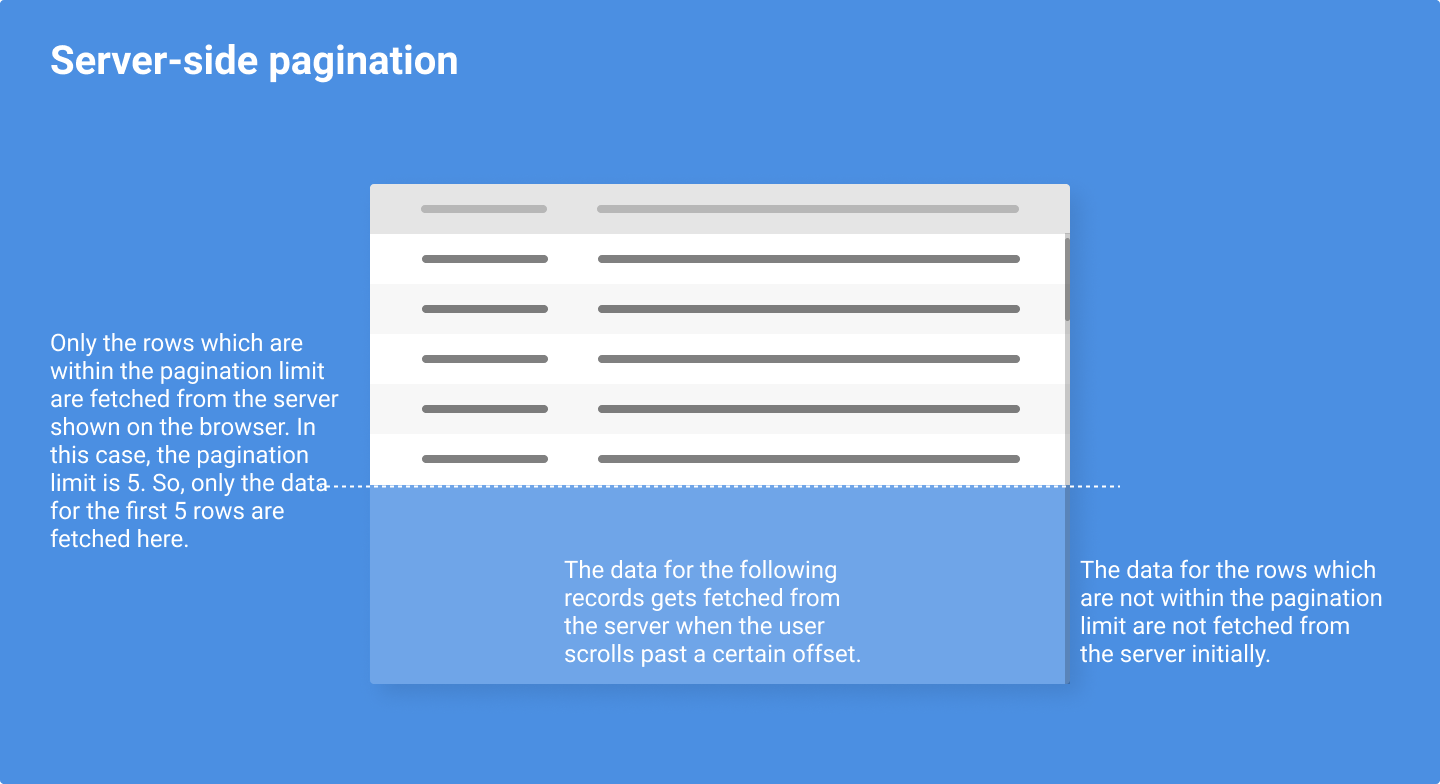
In this type of pagination, the records are fetched from the server in steps. This is a better way of doing pagination because of the following:
- Size of API requests are smaller since they are fetched in chunks
- The load on both the Server and Client is lesser since they've lesser data to deal with. On the Server-side, since the number of records is lesser, computing time for generating those records will be lesser as compared to computing all the records. This might not be noticeable if the total number of records aren't much but when we're fetching thousand records vs ten records, this will be noticeable. On the Client-side, if the number of records are lesser, there will be lesser load on the browser to parse the data and show it to the user.
This type of pagination can be achieved in the following ways:
- Fetch only the necessary records from the server for a particular page
- Show the fetched records for that particular page
- Fetch and show the next set of records when the user clicks on the next page and so on
- Sorting, searching and filtering of records is done on the server-side
Building a simple Pagination component using React
In this step, we'll build a simple Pagination component using React and the Hacker News API. We'll be building a server-side paginated component.
Let's start with creating a new directory for our component:
mkdir react-pagination-component
The above command will create a new directory called react-pagination-component.
We'll be using Yarn to manage our dependencies.
If you don't have Yarn installed on your machine, you can check out their Installation guide
Let's initialize our package using Yarn inside our react-pagination-component directory:
cd react-pagination-component && yarn init
The above command will show an output similar to the following on our terminal:
question name (react-pagination-component):
question version (1.0.0): 0.0.1
question description: A simple pagination component for React.js
question entry point (index.js):
question repository url:
question author: Nirmalya Ghosh (nirmalya.email@gmail.com)
question license (MIT):
question private: false
success Saved package.json
✨  Done in 95.33s.
It'll also generate the following package.json file:
{
  "name": "react-pagination-component",
  "version": "0.0.1",
  "description": "A simple pagination component for React.js",
  "main": "index.js",
  "author": "Nirmalya Ghosh (nirmalya.email@gmail.com)",
  "license": "MIT",
  "private": false
}
Doing the above steps would help us in installing npm packages. We'll be installing React and other packages from npm. npm stands for Node Package Manager and is the world’s largest software registry.
Although it's very easy to add React to a website, managing and upgrading packages would be much easier using npm.
We'd also use Parcel for bundling our application.
yarn add react
yarn add react-dom
yarn add --dev parcel-bundler @babel/preset-react @babel/preset-env
The above command will add react and react-dom to our list of dependencies. It'll add parcel-bundler to our list of dev-dependencies.
We've added parcel-bundler, @babel/preset-react and @babel/preset-env to our dev-dependencies >since we won't need it on production. Our application code will be bundled by Parcel and we'll deploy those assets (HTML, CSS and JavaScript) to our server.
We also need to adding the following script to our package.json file:
"scripts": {
  "start": "parcel index.html"
}
Our package.json file should now contain these:
{
  ....

  "scripts": {
    "start": "parcel index.html"
  },
  "dependencies": {
    "react": "^16.13.1",
    "react-dom": "^16.13.1"
  },
  "devDependencies": {
    "@babel/preset-env": "^7.10.2",
    "@babel/preset-react": "^7.10.1",
    "parcel-bundler": "^1.12.4"
  }
}
We also need to create an index.html file in the root of our project and add a reference to our JavaScript entry point:
<!DOCTYPE html>
<html lang="en">
  <head>
  </head>
  <body>
      <div id="app"></div>
      <!-- Here 👇 -->
      <script src="./index.js"></script>
  </body>
</html>
Let's also create a new index.js which will be our JavaScript entry point:
console.log("Hello from Parcel!");
Now, we can start our application by running the following command:
yarn start
The about application will start running at http://localhost:1234/.
Let's start by fetching a list of news from Hacker News API and show it on our browser. We need to update our index.js file with the following code:
import React, { useEffect } from "react";
import ReactDOM from "react-dom";

const ReactPaginationComponent = () => {
  useEffect(() => {
    fetchData();
  }, []);

  const fetchData = async () => {
    const response = await fetch(
      "https://hn.algolia.com/api/v1/search?query=javascript&hitsPerPage=5&page=0"
    );

    console.log(response);
  };

  return <>Hello</>;
};

ReactDOM.render(<ReactPaginationComponent />, document.getElementById("app"));
Now, if we visit http://localhost:1234/, we'll see the following error:
Uncaught ReferenceError: regeneratorRuntime is not defined
To fix that, we need to add a couple of babel plugins:
yarn add @babel/plugin-transform-runtime @babel/runtime --dev
If we visit http://localhost:1234/, we should be able to view the page without any errors.
Let's show the data fetched in a list. To do that, we'll need to modify our index.js file:
import React, { useEffect, useState } from "react";
import ReactDOM from "react-dom";

const ReactPaginationComponent = () => {
  const [data, setData] = useState([]);

  useEffect(() => {
    fetchData();
  }, []);

  const fetchData = async () => {
    const response = await fetch(
      "https://hn.algolia.com/api/v1/search?query=javascript&hitsPerPage=5&page=0"
    );
    const data = await response.json();

    setData(data.hits);
  };

  const listNode = () => {
    return (
      <ul>
        {data.map((datum, index) => {
          return <li key={index}>{datum.title}</li>;
        })}
      </ul>
    );
  };

  return <div>{listNode()}</div>;
};

ReactDOM.render(<ReactPaginationComponent />, document.getElementById("app"));
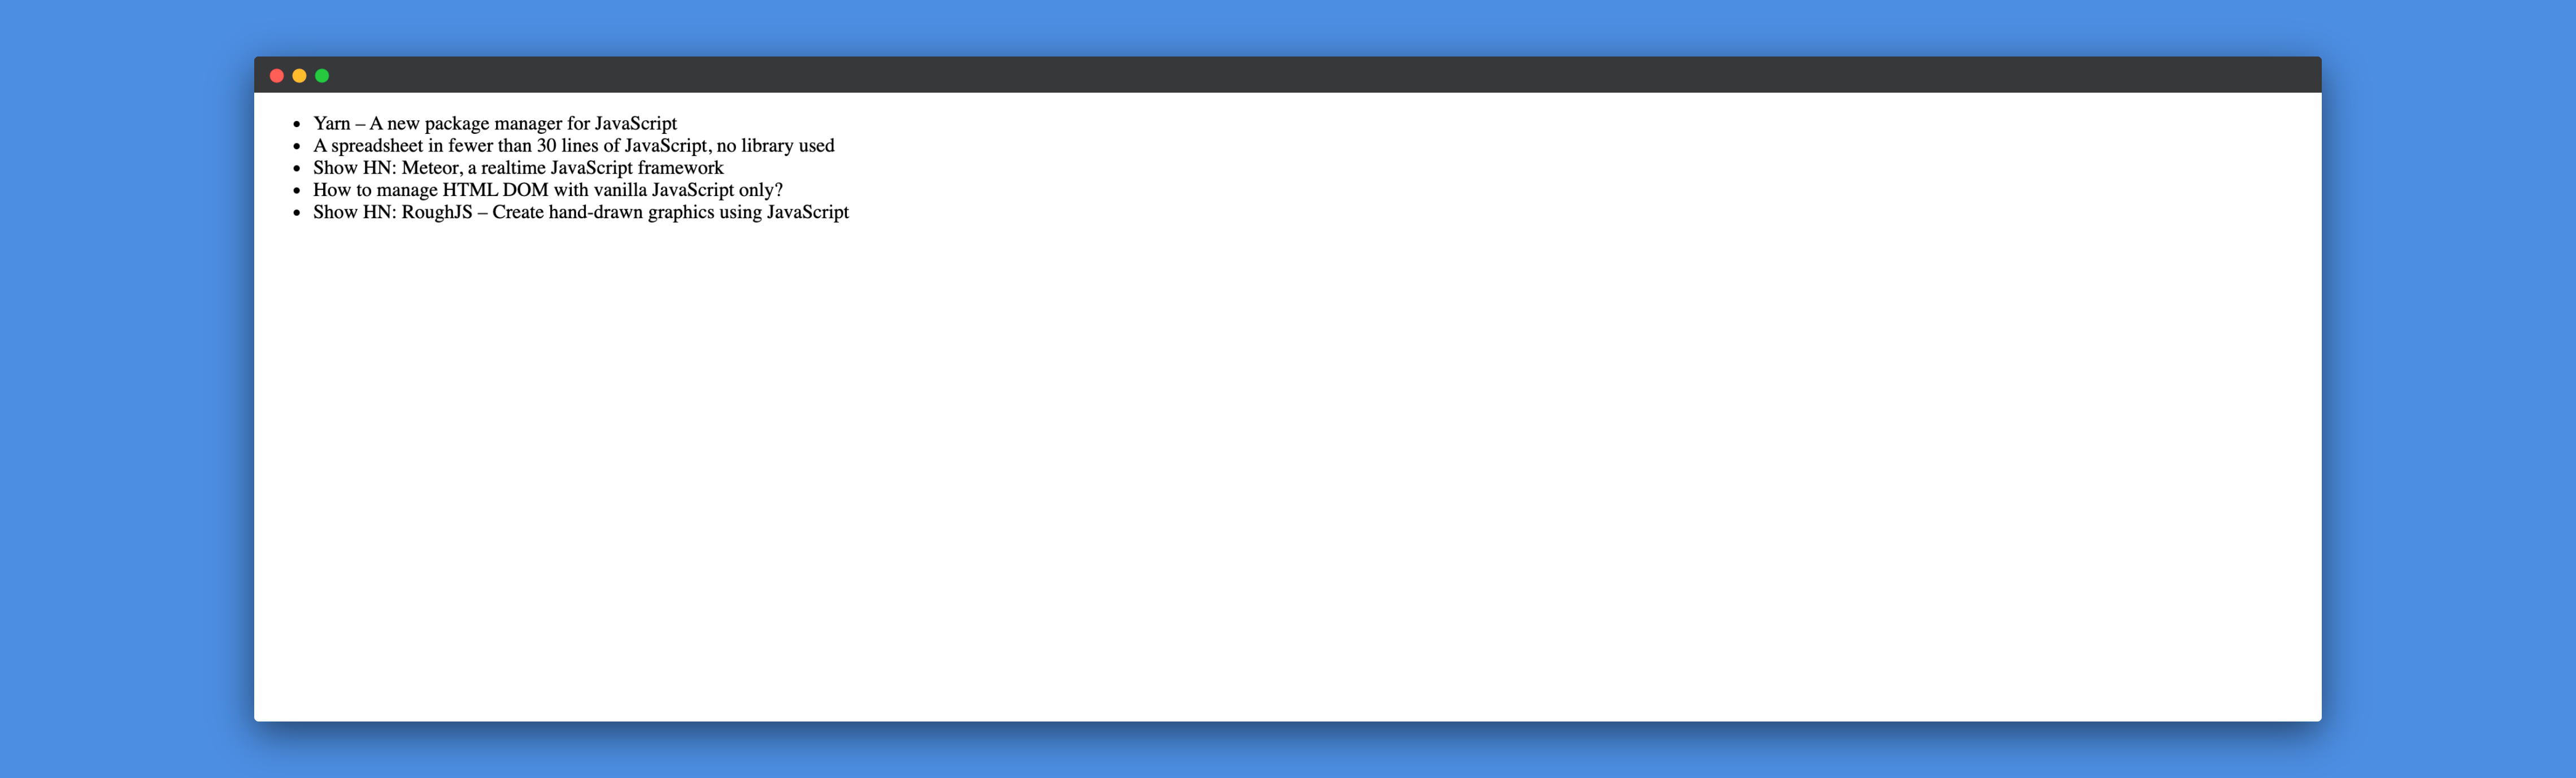
Here, we're fetching the data from the server and storing it in the data
state. In the listNode function, we're iterating over this data and showing it
in a list.
If we visit http://localhost:1234/, we should be able to view the following:
Let's now add the logic to fetch records from the server based on the selected page.
First, we need to define two states to store the totalPages and the
currentPage:
const [totalPages, setTotalPages] = useState(1);
const [currentPage, setCurrentPage] = useState(1);
We also need to update the fetchData function to use the currentPage:
const fetchData = async () => {
  const response = await fetch(
    `https://hn.algolia.com/api/v1/search?query=javascript&hitsPerPage=5&page=${currentPage}`
  );
  const data = await response.json();

  setData(data.hits);
  setTotalPages(data.nbPages);
};
We also need to add a new paginationNode function to show the pagination:
const paginationNode = () => {
  return (
    <ul>
      {[...Array(totalPages)].map((_, index) => {
        return (
          <li key={index + 1}>
            <button onClick={() => handlePageChange(index + 1)}>
              {index + 1}
            </button>
          </li>
        );
      })}
    </ul>
  );
};
Finally, let's update our return function and add the paginationNode
function to it:
return (
  <div>
    {listNode()}
    {paginationNode()}
  </div>
);
Adding styles to our Pagination component
In this section, we'll be adding some styles to our pagination component using Theme UI.
Theme UI is a library for creating themeable user interfaces based on constraint-based design principles. Build custom component libraries, design systems, web applications, Gatsby themes, and more with a flexible API for best-in-class developer ergonomics.
Let's install the package first:
yarn add theme-ui
Once the package is installed, we need to import ThemeProvider and it to our app first:
import { ThemeProvider } from "theme-ui";

const theme = {
  colors: {
    text,
    background,
    primary,
  },
};

....

return (
  <ThemeProvider theme={theme}>
    {listNode()}
    {paginationNode()}
  </ThemeProvider>
);
The values for text , background and primary colors are the props that can
be passed to our component. We can define defaults for those values:
const ReactPaginationComponent = ({
  text = "#000",
  background = "#fff",
  primary = "#33e",
}) => {

....
We need to update our listNode and paginationNode functions to use Box,
Button and Flex components from Theme UI:
....

const listNode = () => {
  return (
    <Box
      as="ul"
      sx={{
        listStyleType: "none",
        p: 0,
      }}
    >
      {data.map((datum, index) => {
        return (
          <Box key={index} as="li" mb={2}>
            {datum.title}
          </Box>
        );
      })}
    </Box>
  );
};

const paginationNode = () => {
  return (
    <Flex as="ul" sx={{ listStyleType: "none", p: 0, flexWrap: "wrap" }}>
      {[...Array(totalPages)].map((_, index) => {
        return (
          <Box key={index + 1} as="li" mr={2}>
            <Button onClick={() => handlePageChange(index + 1)}>
              {index + 1}
            </Button>
          </Box>
        );
      })}
    </Flex>
  );
};

....
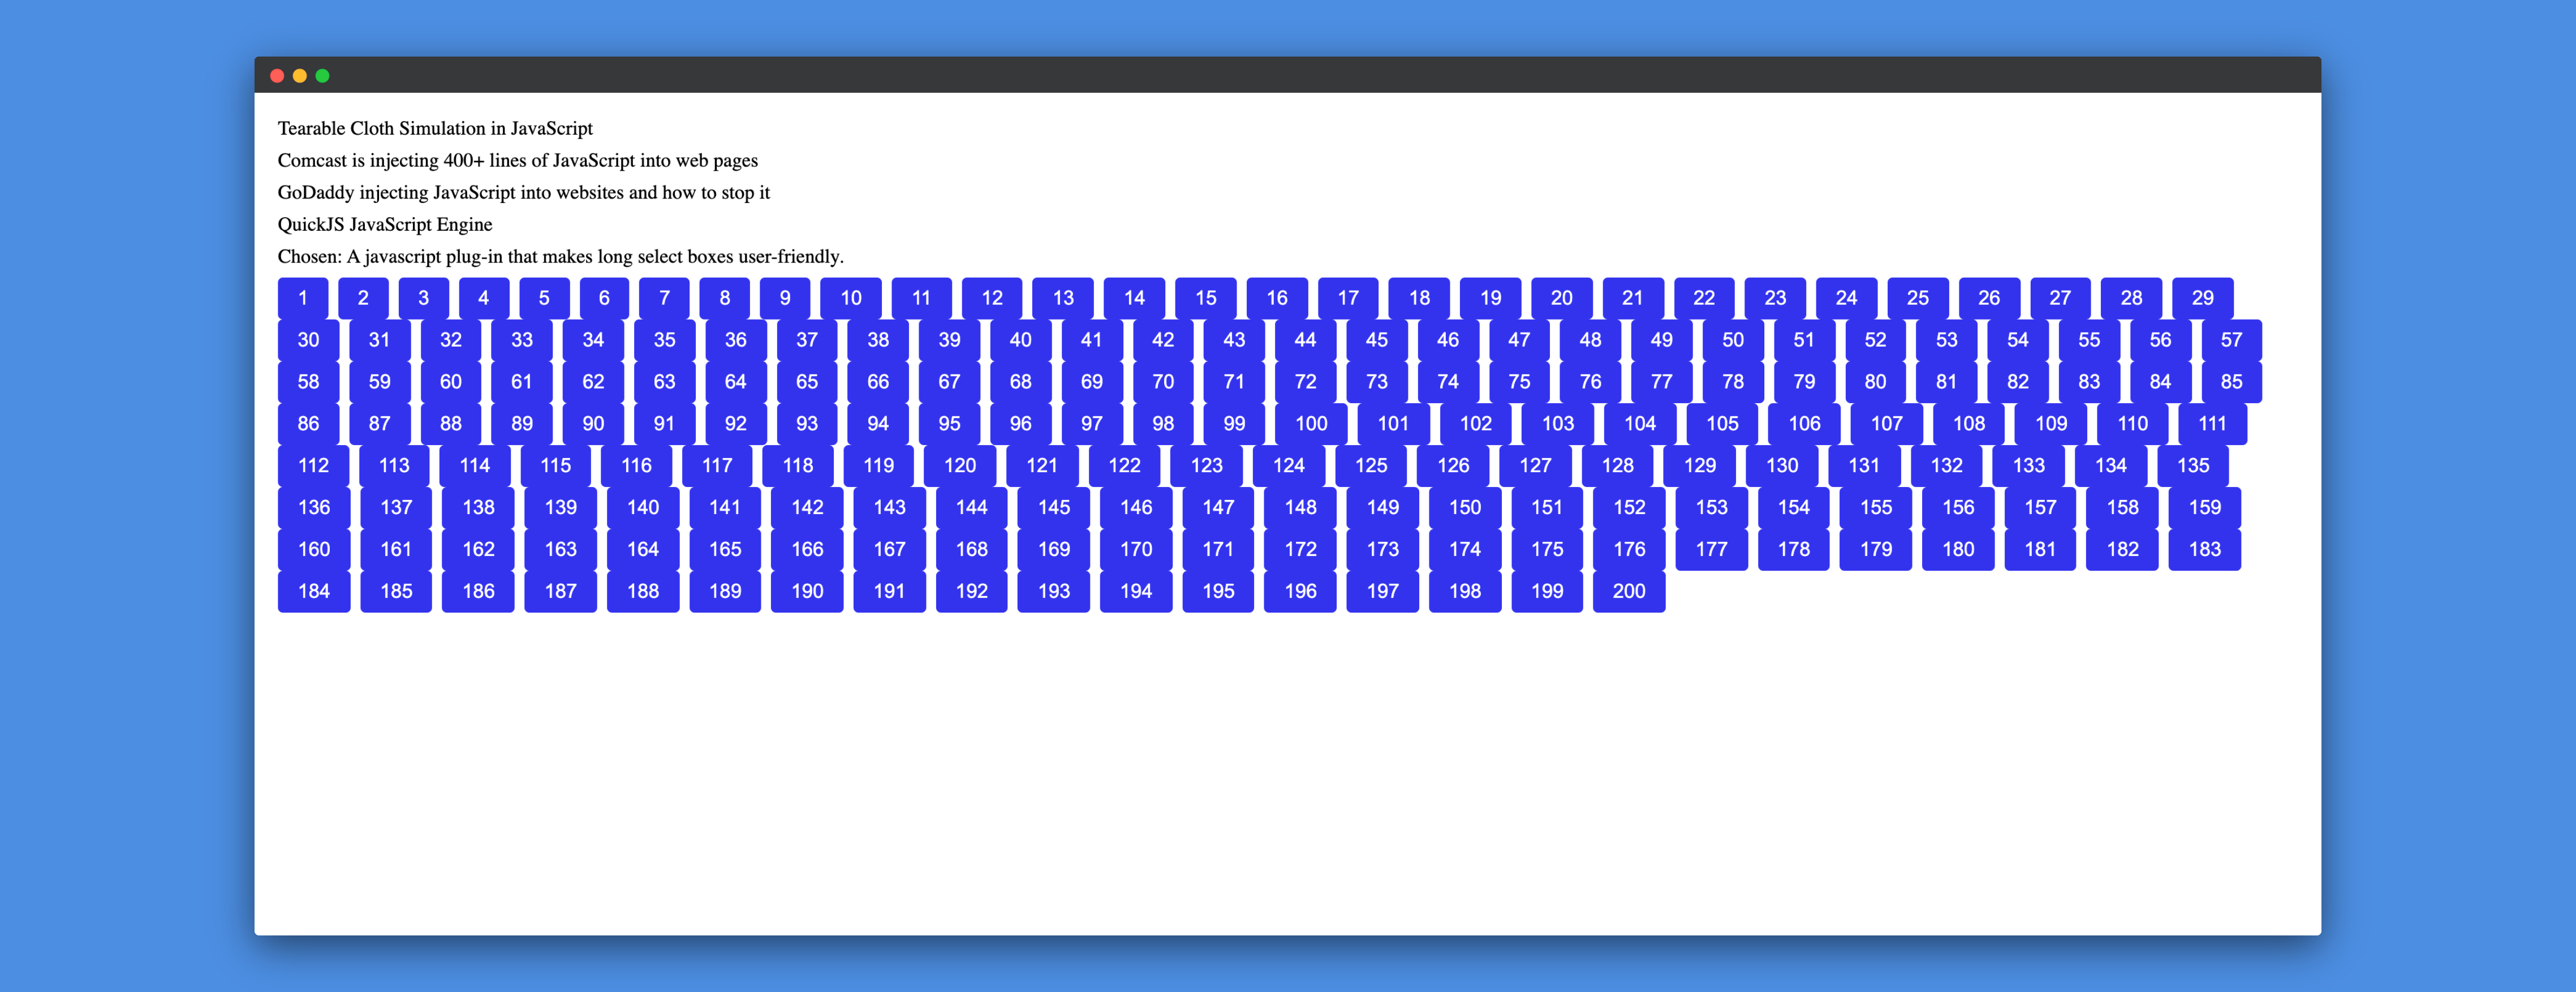
Let's update our pagination logic for a better User Experience.
....

const paginationNode = () => {
  // The logic for generating pagination is taken from
  // https://gist.github.com/kottenator/9d936eb3e4e3c3e02598

  const pageBuffer = 3;
  const startPage = currentPage - pageBuffer;
  const endPage = currentPage + pageBuffer + 1;
  const range = [];
  const rangeWithDots = [];
  let l;

  for (let i = 1; i <= totalPages; i++) {
    if (i == 1 || i == totalPages || (i >= startPage && i < endPage)) {
      range.push(i);
    }
  }

  for (let i of range) {
    if (l) {
      if (i - l === pageBuffer) {
        rangeWithDots.push(l + 1);
      } else if (i - l !== 1) {
        rangeWithDots.push("...");
      }
    }
    rangeWithDots.push(i);

    l = i;
  }

  return (
    <Flex as="ul" sx={{ listStyleType: "none", p: 0, flexWrap: "wrap" }}>
      {rangeWithDots.map((pageNumber, index) => {
        return (
          <Box key={index} as="li" mr={2}>
            <Button
              onClick={() => handlePageChange(pageNumber)}
              disabled={pageNumber === "..."}
            >
              {pageNumber}
            </Button>
          </Box>
        );
      })}
    </Flex>
  );
};

....
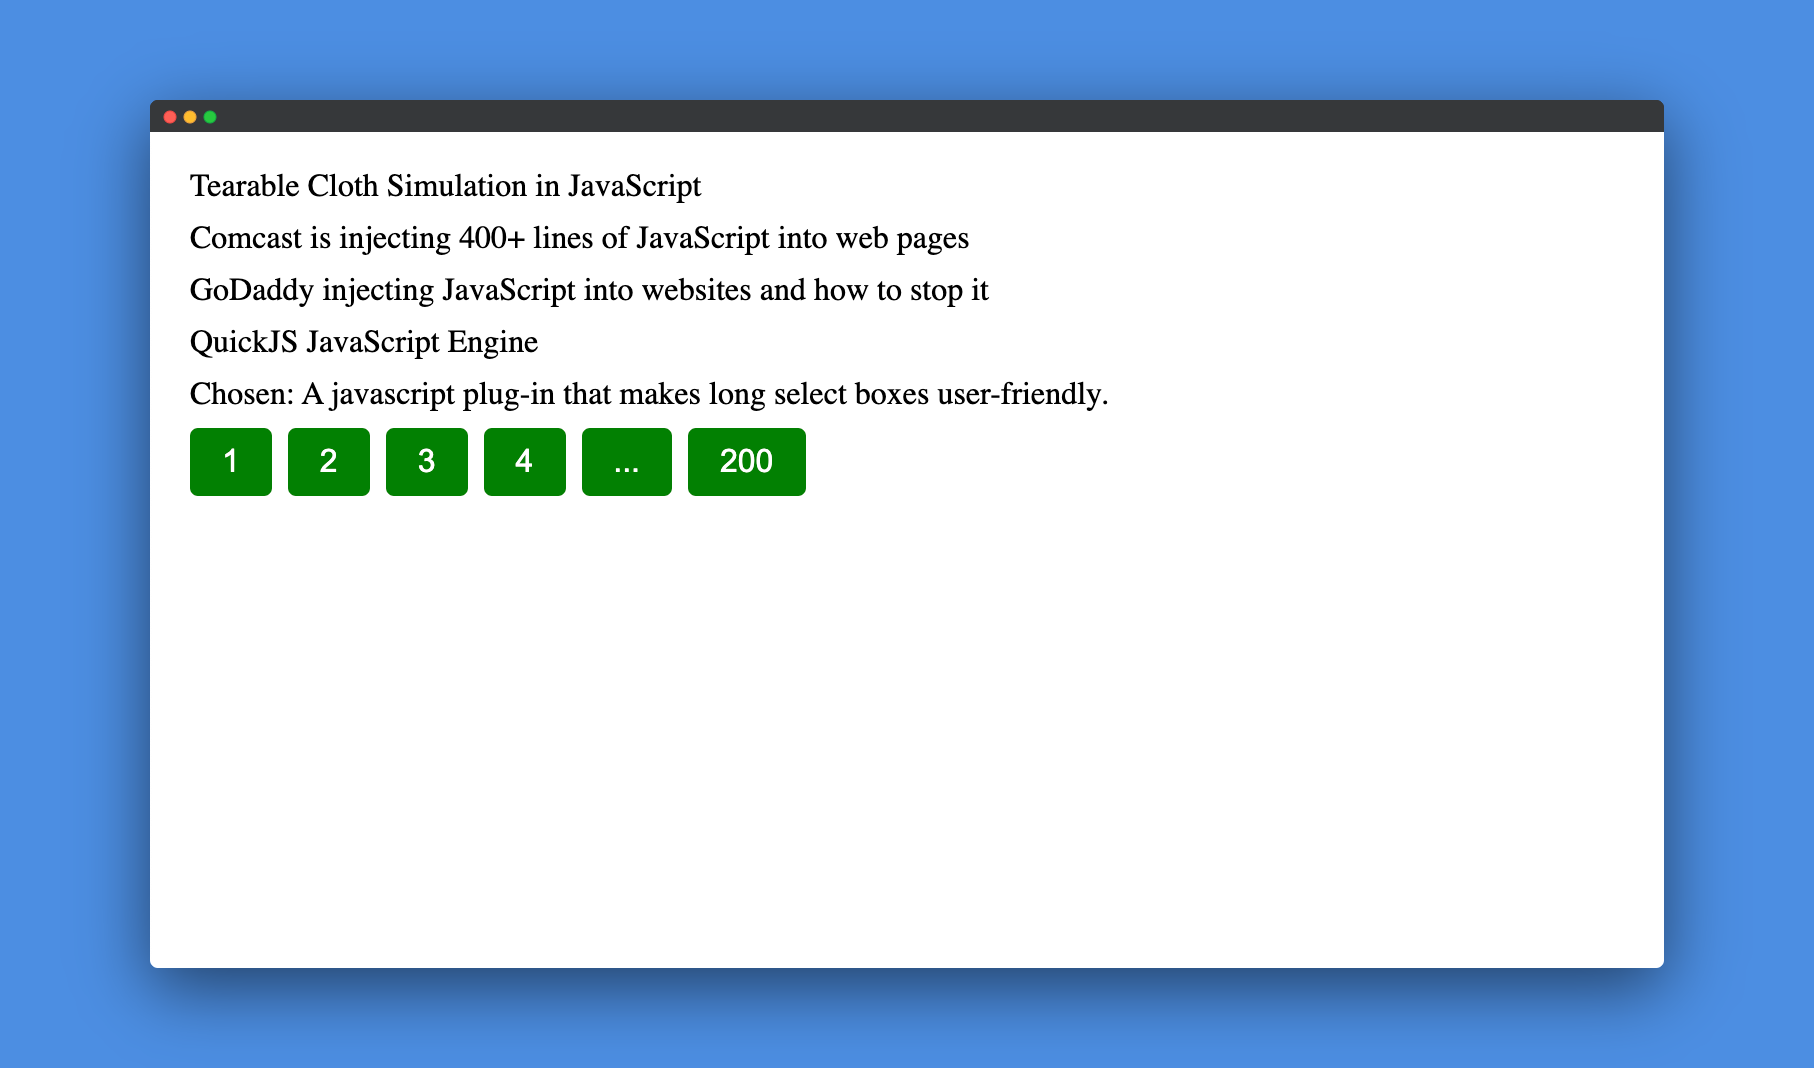
Now, it looks much better.
Making our Pagination component theme-able using Theme UI
As we've used the ThemeProvider component from Theme UI, our pagination
component supports theming out of the box. We can do so by passing a primary
prop to our ReactPaginationComponent:
<ReactPaginationComponent primary="green" />
We can also pass the text prop to update the color of the text on the list items.
Conclusion
In this tutorial, we learnt how to create a basic pagination component using React.js. We also leant how to make our component themeable using Theme UI. The source code is available on Github.
Please note that the code for this tutorial is till this commit. Further changes to this Github repository might make the code different. It's recommended that you check the code for this tutorial till this commit.