In this tutorial, we'll learn how we can build an authentication system in a Next.js application using Strapi and NextAuth.
Table of Contents
- Introduction
- Pre-requisites
- Cloning our repository
- Installing dependencies for the Next.js application
- Copying the environment variables
- Creating and copying the Google client credentials
- Starting the frontend application
- Starting our Strapi application
- Configuring the Google provider in the Strapi admin panel
- Configuring NextAuth with our Next.js application
- Getting session details for authenticated users
- Conclusion
Introduction
Strapi is the leading open-source headless CMS. It’s 100% Javascript, fully customizable and developer-first. I've been using Strapi for some of my Open Source projects and the developer experience is really good. It has helped me build prototypes and products much faster.
I've created a boilerplate so that you can get up and running with Strapi, Next.js and Apollo quickly. Check out the project on Github.

NextAuth is a library for building authentication in a Next.js application. It's flexible, secure and easy to use.
The application that we'll be building is hosted on Vercel and the code is available on Github.
Pre-requisites
Cloning our repository
Let's get started by cloning the repository that we'll be working on. We can clone our repository using the following command:
git clone https://github.com/ghoshnirmalya/nextjs-strapi-boilerplate
Installing dependencies for the Next.js application
We can install all the necessary dependencies by running the following command:
cd frontend && yarn install
Copying the environment variables
We can create a .env file and copy the contents from .env.example which is present in the frontend directory. The following credentials are necessary for authentication:
NEXT_PUBLIC_API_URL=http://localhost:1337
NEXT_PUBLIC_DATABASE_URL=postgres://strapi:strapi@localhost:5432/strapi?synchronize=true
NEXTAUTH_URL=http://localhost:3000
GOOGLE_CLIENT_ID=""
GOOGLE_CLIENT_SECRET=""
Creating and copying the Google client credentials
We can create a new Google OAuth Client and copy the credentials (Client ID and Client Secret) in your .env file.
- Create a new OAuth client ID.
- Choose Web application as the Application Type.
- Add the following Authorized redirect URIs:
http://localhost:3000/api/auth/callback/google
http://localhost:1337/connect/google/callback

Starting the frontend application
From the frontend directory, we can run the following command to start our Next.js application:
yarn dev
Starting our Strapi application
We can go inside the directory of the backend package on another terminal window and start docker compose:
cd backend && docker-compose up
We need to start Docker and then run the above command which will change the current directory to the backend package’s directory and then start the backend package. If everything goes well, it’ll be up and running on http://localhost:1337/graphql.
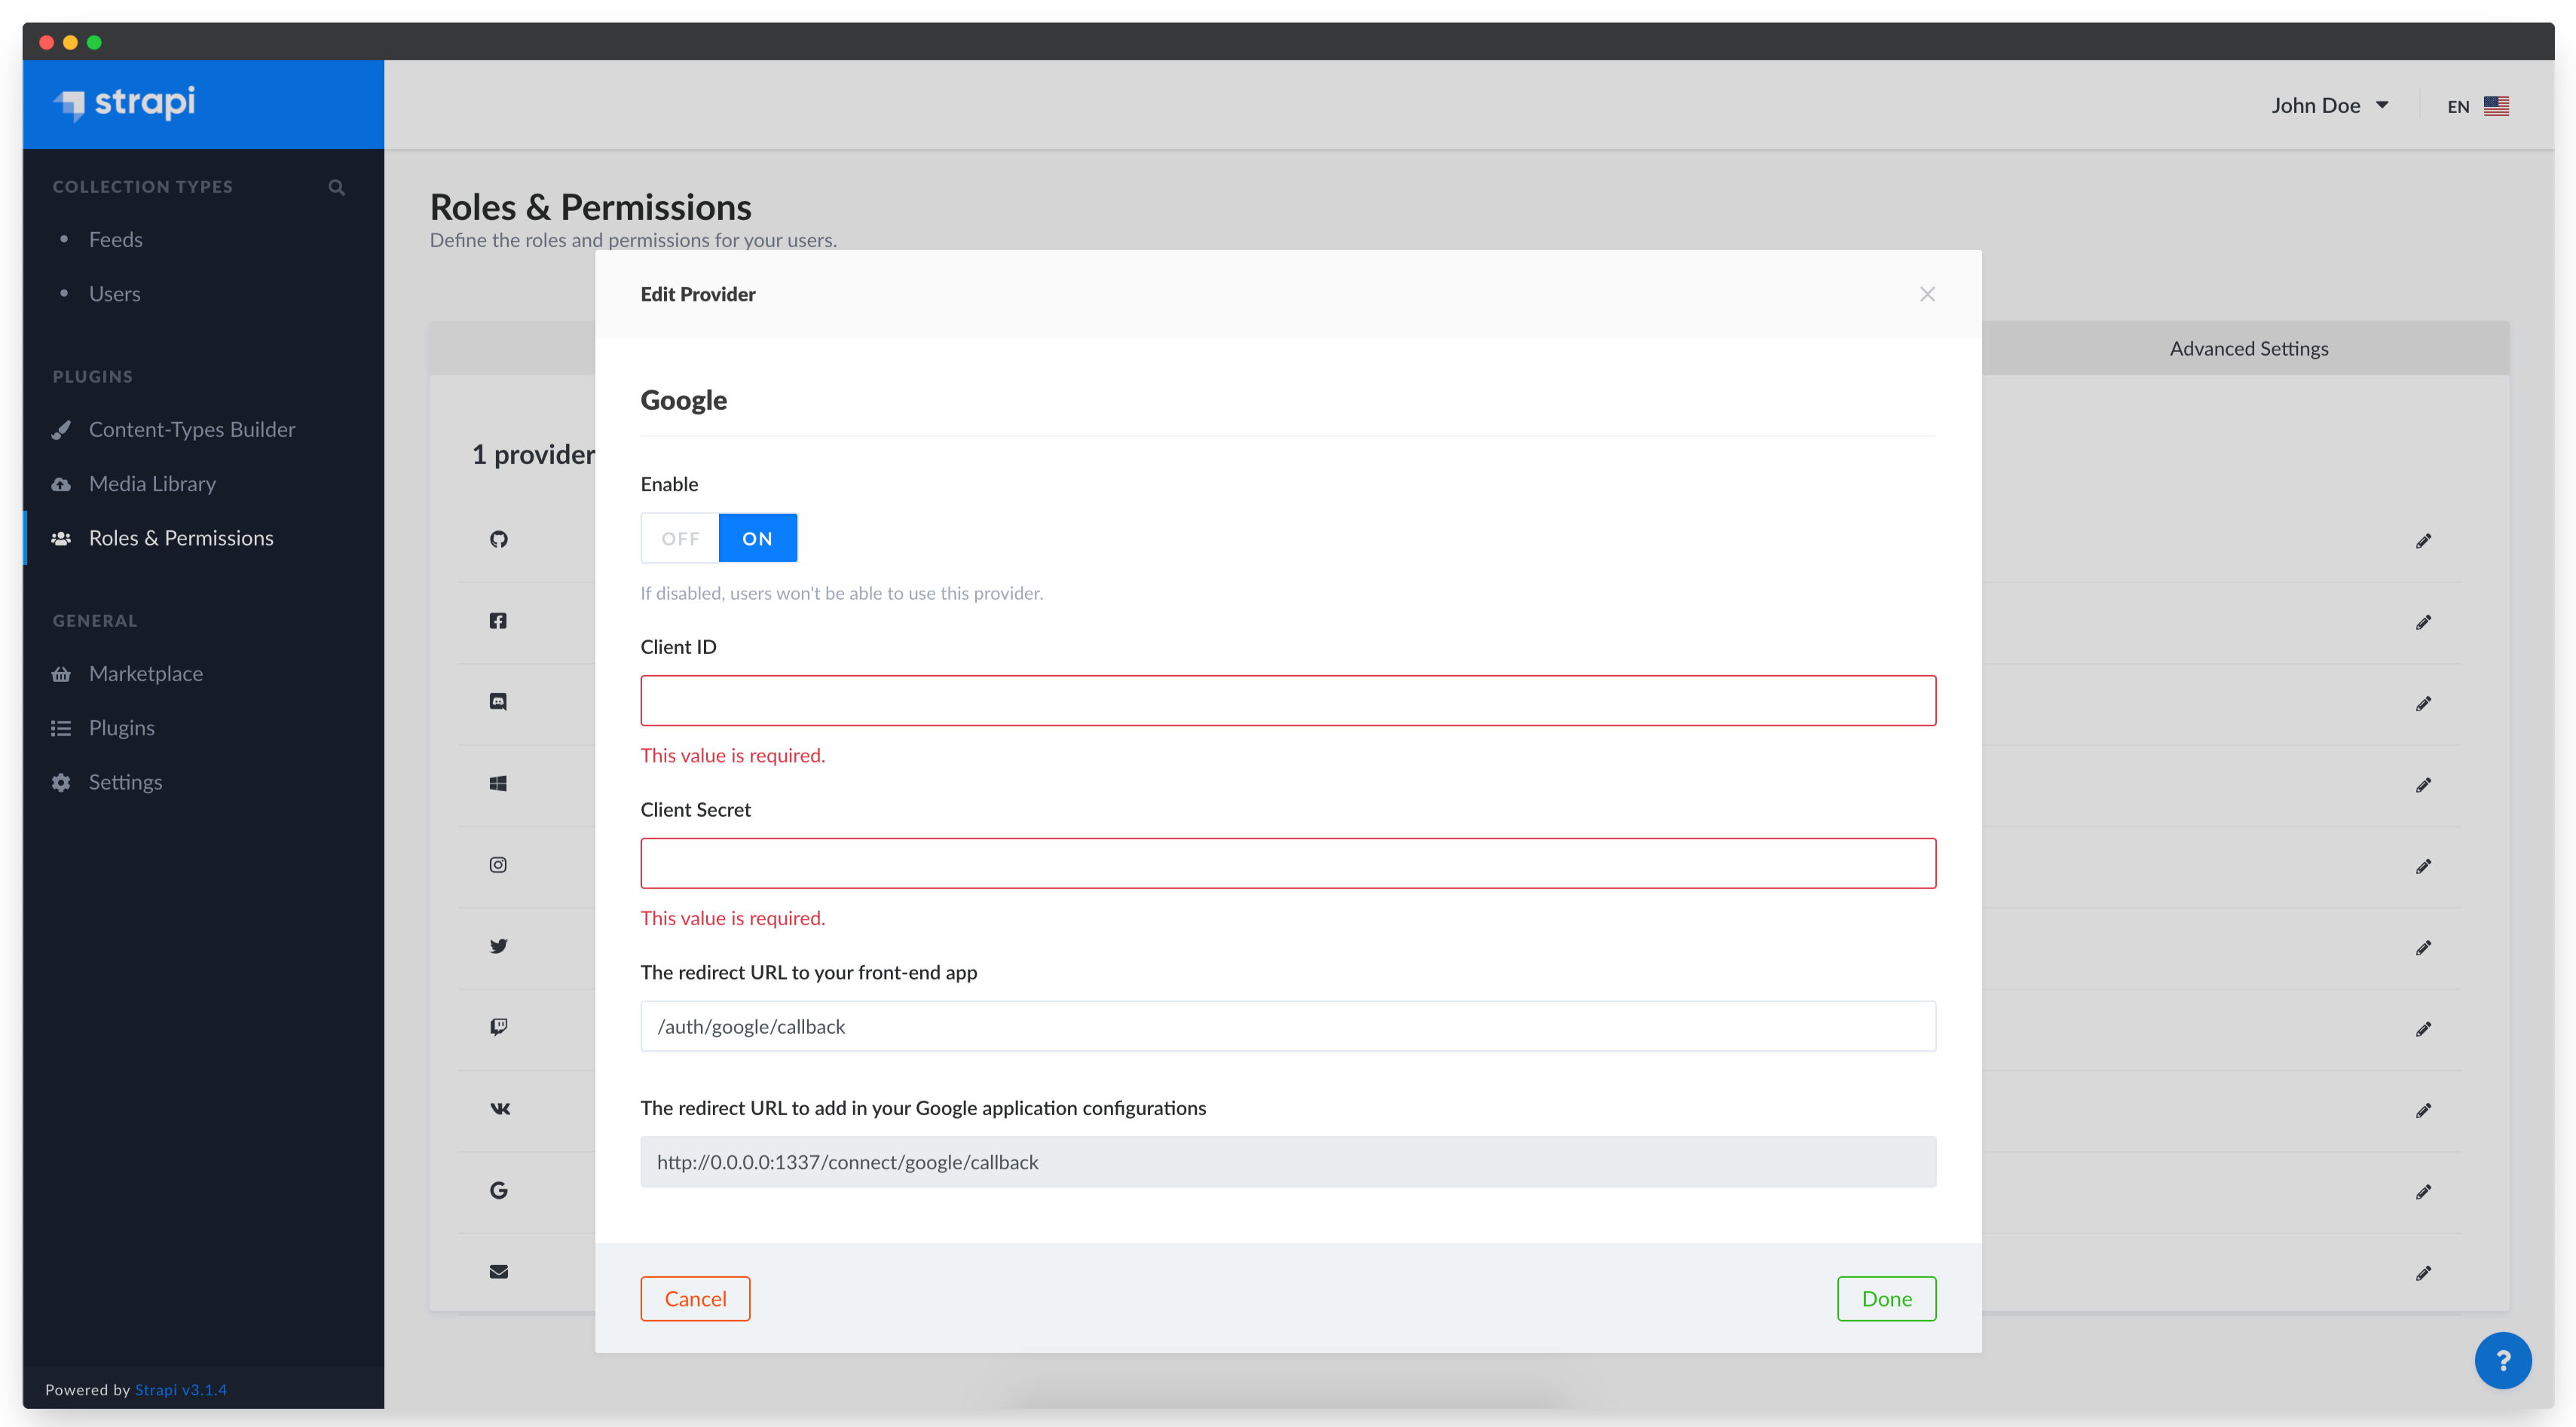
Configuring the Google provider in the Strapi admin panel
In the Strapi admin panel, we need to add the Google OAuth Client credentials and enable the Google provider.
Configuring NextAuth with our Next.js application
All the configurations related to NextAuth is present on the [...nextauth.ts] file. We can use the following NextAuth options to use NextAuth with Strapi:
const options = {
  providers: [
    Providers.Google({
      clientId: process.env.GOOGLE_CLIENT_ID,
      clientSecret: process.env.GOOGLE_CLIENT_SECRET,
    }),
  ],
  database: process.env.NEXT_PUBLIC_DATABASE_URL,
  session: {
    jwt: true,
  },
  debug: true,
  callbacks: {
    session: async (session: ISession, user: IUser) => {
      session.jwt = user.jwt;
      session.id = user.id;

      return Promise.resolve(session);
    },
    jwt: async (token: iToken, user: IUser, account: IAccount) => {
      const isSignIn = user ? true : false;

      if (isSignIn) {
        const response = await fetch(
          `${process.env.NEXT_PUBLIC_API_URL}/auth/${account.provider}/callback?access_token=${account?.accessToken}`
        );

        const data = await response.json();

        token.jwt = data.jwt;
        token.id = data.user.id;
      }

      return Promise.resolve(token);
    },
  },
};
In the NextAuth callback function, we're calling the Strapi Authentication API endpoint. We're storing the JWT and user.id from data that the Strapi API sends us. In this way, we can understand which user is currently authenticated.
Getting session details for authenticated users
We can get the details of the authenticated users from the getSession function of NextAuth. If the getSession function doesn't return us any details, then we can assume that the user is not authenticated.
Conclusion
In this tutorial, we understood how we can implement authentication in a Next.js application using Strapi and NextAuth. I've created a boilerplate so that you can get up and running with Strapi, Next.js and Apollo quickly. Check out the project on Github. Documentation of this project is available here.